November 2, 2025

LEAFY BREATHS

Here in central Wisconsin, most of the colorful leaves have fallen. No!!! That means winter is next!

Sometimes with all the various aspects of life, we need to be reminded: just breathe. So, here is your sign to do just that. 


SUPPLIES:

Tan cardstock

Darker tan cardstock

Assorted fallish patterned paper

Just Breathe stamp

Black ink

Tan ink

Big Shot

Textured Embossing Folder

Gems

Dimensionals

INSTRUCTIONS:

Fold a 5 1/2" x 8 1/2" piece of tan cardstock in half, creasing it well with a bone folder.


Emboss a 4" x 5 1/4" piece of a darker tan cardstock with a textured embossing folder. Add this textured piece to the card base.


Cut a piece of subtle patterned paper which coordinates with the other colors to 1 1/2" x 5. Adhere this over the textured cardstock, leaving even margins at the sides and the top.


Go through scraps of autumn-colored patterned paper. The papers can't be too dark in color because you will be stamping on them. I looked for one in an orange, one in a gold and one in green. Stamp a maple leaf on each of these colors. After fussy cutting the leaves, removing the stems, use Dimensionals to adhere them evenly across the 1 1/2 x 5" strip. Start with the placement of the two end leaves, ending with the center one.


On a 1" x 5" strip of the lighter tan cardstock, stamp a sentiment in the darker tan ink. Use Dimensionals to add this to the bottom of the card.


Finish by placing a faceted gold gem on either side of the sentiment.


Leafy

Smiles.


October 13, 2025

BURLAP LEAF

When creating a card, I love to incorporate surprising or odd elements, things you may not think of for papercrafting.

In this example, I used two stranger things (hey! That should be a television program!). They are wire-edged burlap trim and a fallish napkin.

Check out my tutorial on how I used these two oddities.


SUPPLIES:
Light neutral cardstock

A detailed oak leaf stamp

VersaMark Ink
Embossing Buddy
Gold Embossing Powder
Heat Tool
Paper Snips
Wire-Edged Burlap Trim
Fallish Napkin
Glue Stick
Dimensionals

INSTRUCTIONS:
Cut a piece of light neutral cardstock to 4 1/4" x 8 1/2". Fold it in half, creasing it well with a bone folder.

Cut a piece of light-colored scrap cardstock to 3 3/4" square.

Peel away only the top ply (layer) of a fall-flavored napkin. The one I used is very delicate, so, if yours is also delicate, use a lot of caution when doing the following steps. Crush the napkin in your hands, then almost flatten it. Repeat this process three times. Using a glue stick, cover one side of the 3 3/4" square cardstock, bringing the glue to the corners and edges. Gently press the napkin to the gluey surface, centering it as well as possible. Do not smooth out what little texture you have. NOTE: If you use a heavier napkin, you will get more pronounced texture. Just gently tap on it so it adheres to the glued area. Fold the excess napkin edges to the back of the cardstock and secure it in place with glue stick, mitering the corners.

Attach the napkin piece to the card front.

Cut a 3 1/4" piece of wire-edged burlap trim. I got my roll at Dollar Tree. Carefully adhere this to the napkin portion. Use glue sparingly on the edges to secure it in place.

On the same cardstock as the card base, stamp in VersaMark Ink a fall oak leaf, after rubbing an Embossing Buddy over the cardstock first. Use gold embossing powder to heat emboss the leaf.

Fussy cut the leaf, leaving white edges rather than cutting right up to the gold lines. This makes for easier cutting.

Use Dimensionals to add the leaf to the burlap piece.

Fall
Smiles.

September 25, 2025

THE DAILY BIRD June/July 2025

Well, I guess it's time for another installment of The Daily Bird. In this post, I will be sharing a few birds that I'd drawn during June and July, 2025.

As I always do, I will give the name of the bird above each drawing, as well as the whereabouts of this bird somewhere in the world.

western yellow wagtail

europe, asia, africa


harlequin duck
north america, geenland, iceland, eastern russia

fire-tailed myzornis
butan, china, india, myanmar, nepal

common loon
north america, southern greenland, iceland

jungle myna
indian subcontinent

sula pitta
indonesia

green heron
north and central america

golden eagle
northern hemisphere

red-breasted merganser
subarctic northern hemisphere

strawberrry finch
tropical asia

scarlet-backed flowerpecker
south and east asia

And there you have it.

Please keep in mind that this is my personal art, and is not to be copied or used in any way without my express permission.

Thanks for following along on my bird journey!

Birdie
Smiles.


September 5, 2025

STRIPPING

If you're a cardmaker like me, you have lots of strips of patterned paper that you just cannot throw away. Why? 'cause. I'm gonna use it some day. Yeah, right. But does that day ever come? Sooner than you can imagine possible, you are buried in pretty strips. Nooooo!

Well, the time has come to use some of these pretty strips. Gather together a bunch of them that have a little bit of something in common, be it a color scheme, a design likeness. Anything that will make this grouping seem cohesive.

The charming result could be something like this card:
SUPPLIES:
Leftover strips of patterned paper with SOMEthing in common
Cardstock that matches one of the colors in your pretty strips
White cardstock

Ink in the coordinating color

A salutation stamp

Big Shot
Circle dies
Sequins that complement the color scheme
White satin ribbon
1/4" ribbon in coordinating color
Dimensionals

DIRECTIONS:
Select nine different designs of patterned paper that work well together. Cut the papers to 1/2" x 5" strips. Set these aside for now.

Fold a 5 1/2" x 8 1/2" piece of white cardstock in half, creasing it well with a bone folder.

To this white card base, add a 4" x 5 1/4" piece of coordinating cardstock.

Cut a piece of white cardstock to 3 3/4" x 5". Arrange the nine 1/2" strips as you like onto the white cardstock, leaving as even a border between them as possible. I started with the top strip, then the bottom strip, alternating up and down until you reach the center. If you're like me, the spacing between the strips will not look so great by now. To cover the spacing error, layer a 1/4" piece of ribbon over a 1/2" piece of another ribbon. Adhere this ribbon over the awkward spacing, taping the ends on the back. There! Now no one will notice. If your spacing comes out nicely, congratulations! Good job!

Adhere the strippy piece to the card base.

Using circle dies, find a die that measures 2 1/2" across, and die cut a circle from the same cardstock as the second layer.

Repeat with the circle that measures 2 1/4" across, but this time from white cardstock.

In coordinatiing, ink, stamp a sentiment that fits nicely within the white circle.

Adhere the two circles together. Using Dimensionals, add the circle to the card, raised a bit from center.

Add a trio of coordinating sequins to the white circle.

Strippy
Smiles.

August 29, 2025

RIBBON BUTTERFLY

To anyone who will listen, I always comment that my house is extra full because I see nearly everything as a potential art supply.

I save things that "normal" people would throw away without a thought. Not me. To my husband's and daughters' chagrin. But I love it because I have so many art supplies at hand. Case in point: this lovely wire-edged ribbon that came on a plant my husband gave to me. Who could possibly throw this away? Certainly not yours truly.

Follow along to discover what you can do on a card with ribbon that is just too beautiful to throw away.


SUPPLIES:
White cardstock
Pink cardstock

Thinking of You stamp

Pink ink

Big Shot
Embossing folder
Dies for labels and butterfly
Green rhinestone
Wired floral ribbon
Dimensionals

DIRECTIONS:
Fold a 5 1/2" x 8 1/2" piece of white cardstock in half, creasing it well with a bone folder.

Add to this white card base another piece of white cardstock, this one measuring 4" x 5 1/4".

Cut a piece of bright pink cardstock (or a color that coordinates with the ribbon you have chosen) to 2" x 5 1/4". Adhere the strip of ribbon, cut to 5 1/4",  to this. The ribbon I used was 1 1/2" wide.

Add the ribbon strip to the card front, centered.

Use white cardstock to cut the label shape and emboss the label with a suitable embossing folder.

From the same pink cardstock, die cut the butterfly.

Put adhesive on the outer edges of the butterfly and add it to the embossed label. Use Dimensionals to adhere it to the flowered strip so it is a bit more than 1" from the top of the card.

On white cardstock, stamp your sentiment in a coordinating ink.

Die cut the sentiment with a label die that fits the sentiment.

With Dimensionals, add the sentiment to the center strip, about 1/2" down from the bottom of the embossed label.

Add a green gemstone to the center of the butterfly body.

Ribbon
Smiles.


August 18, 2025

THE DAILY BIRD APRIL/MAY 2025

Hey all. Time to share a handful of bird drawings I've done lately. Since medical problems reared their ugly heads in March, I feel I should change the name of my challenge from The Daily Bird to The Occasional Bird. I just don't feel moved to draw a bird each and every day. Here it is, August already, and I still haven't gone back to drawing a bird every day. Maybe some time in the not too distant future, I hope.

Since pickins' were scarce, I am sharing drawings I've completed during April and May, 2025. As I've always done with these posts, I will include above each bird its name and also where in the whole wide world these particular birds can be found.

tibetan snowcock
western himalayas, tibetan plateau

golden bowerbird
queensland, australia

bearded vulture
iran, southern europe, east africa, indian subcontinent, tibet, the caucasus

amazonian motmot
amazon lowlands, low andean foothills from eastern venezuela to eastern brazil 
and northeastern argentina

awebo (willow ptarmigan)
europe, tundra of scandinavia, siberia, alaska, canada

yellow-crowned night heron
the americas

madagascar pochard
madagascar

blue-winged mountain tanager
bolivia, colombia, ecuador, peru, venezuela

white-bellied kingfisher
equatorial west africa

white-browed robin-chat
africa

northern ground-hornbill
africa

asian koel
indian subcontinent, china, southeast asia

african jacana
sub-saharan africa

There! That wraps up another edition of bird sharing.

I share almost all of my bird drawings on Instagram. I would love it if you followed me there: instagram.paperseedlings.com.

Let me know if you'd ever like a print of any of my bird drawings!

Also, if you ever have a suggestion or special request of a bird for me to draw, send it to me!

Thanks for following me along on this bird-y journey!

Feathered 
Smiles.


July 25, 2025

SENDING HUGS

Patterned paper is so beautiful and so versatile. It can lend itself to a plethora of uses. 

Were you aware that you can effortlessly make your own patterned paper? And the best part of making your own is that it will be UNIQUE. No one will ever be able to reproduce it or buy it in a big box store.

Just choose a few stamps that you love and that will work when stamped repeatedly. Then you need to figure out your color combination. Then you need to get started!

The background of this card was made by little ol' me. Read on to discover how easy it is!


SUPPLIES:
White cardstock
Coordinating cardstock

Stamps of your choice
Sentiment stamp

Coordinating inks

Big Shot
Dies with which to make the focal point
Coordinating ribbon
Dimensionals

DIRECTIONS:
Fold a 5 1/2" x 8 1/2" piece of white cardstock in half, creasing it well with a bone folder.

After choosing your color combo, cut a coordinating piece of cardstock to 4" x 5 1/4". Add this to the white card base.

Cut a piece of white cardstock to 3 3/4" x 5". This will be the beginning of your "patterned paper". Starting with the largest stamp, stamp an image close to the center of the cardstock. Continuing with the same stamp and ink color, keep on stamping, never overlapping and turning the stamp with each impression. With your other color and the smaller stamp, fill in the blank spaces. Be sure, when stamping, to go beyond the edges so the design seems to continue rather than just be confined to the space within the piece.

Add the stamped piece over the previous layer.

Using the Big Shot and the dies you have chosen to use with the sentiment, grab the same cardstock you used on the second layer to do so. Layer and combine the pieces as you desire, adding a snippet of ribbon, if you wish. 

Stamp the sentiment in the ink color you used for the smaller stamping on the background.

Once your sentiment combination is finished, add it to the card, raised a bit from the center point.

Yay! You made patterned paper! Congrats!

Patterned
Smiles.

July 15, 2025

THOUGHTFUL HUMMINGBIRD

If you ever get your hands on patterned paper that utilizes shapes outlined in a metallic ink on white, you can make that paper your very own! 

Select a color combination that you enjoy. The focal point of my card is an outlined hummingbird. When choosing my colors, I chose colors that would work well on a hummingbird. In my case, that is blue, green and a goldy-yellow.

Now, go ahead and color in only a handful of the shapes on the patterned paper. 

Read on for a tutorial on how I created the rest of my card.


SUPPLIES:
White cardstock
Metallic foiled paper to coordinate with the patterned paper
Patterned paper with metallic outlined designs

VersaMark Ink

A stamp of a colorable image

Markers of your choice. I used alcohol-based markers

Big Shot
Embossing Buddy
Metallic Embossing Powder to match
Heat Tool
Deckled Circles dies
Metallic Ribbon
Rhinestones
Dimensionals

INSTRUCTIONS:
Fold a 5 1/2" x 8 1/2" piece of white cardstock in half, creasing it well with a bone folder.

Cut a piece of patterned paper with metallic outlined designs to 4" x 5 1/4". Using markers of your choice, color in a selection of the designs. You don't need to color in the center designs as they will be covered with your focal image.

Add this piece to the card base.

Rub a 3 1/2" square of white cardstock well with the Embossing Buddy. In VersaMark Ink, stamp your image. Cover the stamped image with your metallic embossing powder. Use the Heat Tool to melt the embossing powder until it is uniformly shiny.

Use the same colors of markers you used on the background paper to color in your focal image.

Using Deckled Circles dies, die cut the colored image. From coordinating metallic cardstock, cut another deckled circle a bit larger than the image one.

Cut a 4" length of metallic ribbon. Fold it in half, and adhere it to the lower portion of the back of the image piece so the ends extend from the bottom. Trim the ribbon to your liking.

Adhere the circles together, sandwiching the ribbon between them. 

Use Dimensionals to add the circle to the card, leaving approximately even margins at the sides and the top. 

For a final touch, add a few rhinestones around your image.

Select
Smiles.

June 20, 2025

THE DAILY BIRD March 2025

Hey all! I am pleased to bring to you a selection of the birds I drew during March, 2025. Life was still ordinary for me for most of March. But, then, on March 23, my life changed quite a lot, and things stayed in upheaval until into June. Upon the arrival of the mess on March 23, I debated whether I should change the name of my personal challenge, The Daily Bird, to the more appropriate The Occasional Bird.

That said, the quantity of birds that I have drawn since that date is more occasional than daily. So, please bear with me as I work to get my bird challenge back to a daily endeavor. Still not quite there yet -- June 20, the first day of summer.

Anyway, following are some selections from March 2025, when life as still sort of "good". 

As always, above each bird, I will include the name of the bird as well as where in the world that particular bird can be found.
palm nut vulture
sub-saharan africa

wood duck
north america

painted firetail
australia

great blue turaco
africa

great argus
southeast asia

white-cheeked turaco
eritrea, ethiopia, south sudan

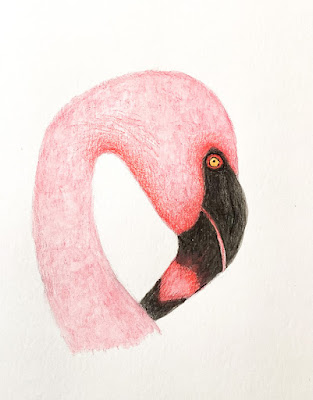
chilean flamingo
south america

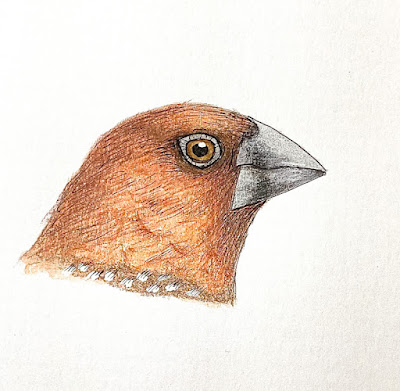
scaly-breasted munia
tropical asia

rufous-collared sparrow
temperate south america

crimson sunbird
southern asia

blue rock thrush
rocky outcrops from europe to asia

koklass pheasant
indian subcontinent

painted stork
tropical asia

superb fruit-dove
australasia

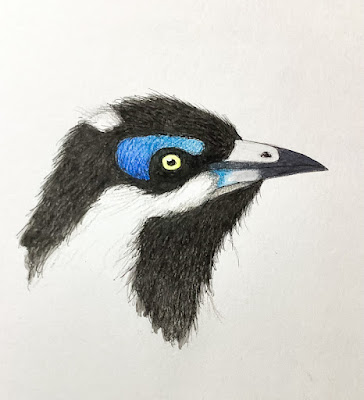
blue-faced honeyeater
australia, new guinea

northern white-faced owl
africa

That's a wrap. My favorites from March.

If you would like to be bored by finding out what happened starting March 23, just ask me in a comment. As I inferred, I am still not drawing a bird on a daily basis yet.

I have prints of several of my birds, and can always get more made up. If you would like a print of any of my birds, please let me know. I would be so honored.

Occasional
Smiles.


June 8, 2025

DOILY BUTTERFLY

 How about a black and white card with just a couple touches of turquoise? Here you go!


SUPPLIES:
White cardstock
Black cardstock
Black and white patterned paper with butterflies

Turquoise doily

Big Shot
Deckled Circles dies
Butterfly die
Turquoise gem

DIRECTIONS:
Fold a 5 1/2" x 8 1/2" piece of white cardstock in half, creasing it well with a bone folder.

To this white card base, add a 4" x 5 1/4" piece of black and white patterned paper with butterflies on it.

About 1/4" from the top of the black and white paper, add a turquoise doily, raised a bit from center. The one I used on my card is about 4" in diameter.

From white cardstock, die cut a deckled circle that measures 2 3/4" across. From black cardstock, die cut another deckled circle that measures 2 3/8" across. Adhere these circles together.

From white cardstock, die cut a butterfly.

Adding adhesive onlyy to the body portion of the butterfly, add it to the black circle.

Add a turquoise gem to the butterfly's body.

If desired, gently tilt the wings iinto a flying position,

Adhere the completed circle to the center of the doily.

Winged
Smiles.

May 28, 2025

BIRDIE THANKS

A fun thing to do with patterned papers is to divide them up into tile-like sections. Doing this gives the viewer's eye a little something extra to work on. On this card, the cheery spring-like design was divided into three vertical strips. It makes the card a little more interesting to look at.

SUPPLIES:
Light Blue Cardstock
White Cardstock
Patterned Paper
Vellum

Big Shot
Tags dies
Thanks dies
Blue Baker's Twine
Mini Dimensionals

INSTRUCTIONS:
Fold a 4 1/4" x 11" piece of light blue cardstock (or any color to match your patterned paper) in half, creasing it well with a bone folder.

Cut three strips of the patterned paper that measure 1 5/8" x 4".

Starting with the strip on the left, add it to the card base, leaving an even border at the top, bottom and left side. Repeat with the strip on the right. The center strip should fit nicely in the remaining space.

Use an appropriately sized tag die to cut a tag from vellum.

Using a two-part thanks die, cut the larger portion of the word from the light blue cardstock, and from white cardstock, cut the smaller portion of it.

Carefully adhere these two pieces together.

Add the completed word to the vellum tag.

Use a dark blue baker's twine (or one that coordinates with your card) to tie a bow through the hole in the tag.

Use Mini Dimensionals behind the letters to adhere the tag to the card.

Add a coordinating flower in the upper right corner of the card.

Birdie
Smiles.

May 7, 2025

THE DAILY BIRD January/February 2025

I have been trying for the past several weeks to recover from an injury to my right hand. I'd always said, "Take away my right hand or my eyes, and I'm finished." Well, my right hand hasn't been taken away completely; it is reovering. So, I guess I'm not finished yet. 

Because of this injury, I have only drawn a few birds. Only a few because, when I do draw one, I pay with a great deal of pain the next day. 

But, for now, I have a handful of bird drawings I did as part of my personal challenge, The Daily Bird, from January and February. 

Now, as I always do, above each bird drawing, I will note the name of the bird, as well as where in the world this bird can be found in the wild.

Here goes:

khalij pheasant

himalayan foothills, nepal, pakistan, western thailand


black-rumped flameback

indian subcontinent and sri lanka


graylag goose
europe

junglefowl
bangladesh, bhutan, cambodia, china, india, indonesia, lao people's democratic republic, malaysia, myanmar, nepal, pakistan, philippines, singapore, thailand, timor-jeste, vietnam
drongos
africa, south asia, australasia
barbary falcon
canary islands, parts of north africa, to the middle east

indian golden oriole
indian subcontinent and central asia

black kite
australasia, eurasia, africa

himalayan griffon
north and northeastern india, tibetan plateau

rufous treepie
indian subcontinent, southeast asia

white-naped crane
northeastern mongolia, northeastrn china, russia

wattled jacana
south america

tufted penguin
coast from central california to alaska

cape griffon
south africa

greater yellow-headed vulture
amazon basin of tropical south america

black-collared starling
southern china and most of mainland southeast asia

visayan hornbill
philippines

red knot
far north of canada, europe and russia

If you would like prints of any of my birds, please just let me know. Several of those in this post have already been made into prints, so I may already have one or more available. The prints are made from the actual drawings themselves. Those that  you see here are just quick photographs of the drawings.

Thanks for accompanying me on my birding journey.

Birdie
Smiles.