January 31, 2023

GIVE THANKS

I had initially designed this card for Thanksgiving, but have never shared it with you. But, the fold of it is so interesting, that is what I am going to focus on today. 


Because of the intricacy of the folds in this card, 
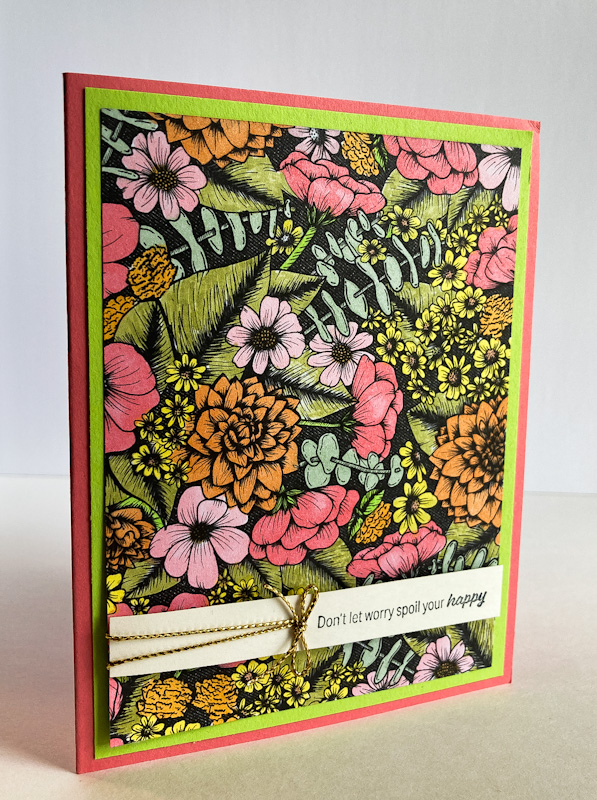
it is very difficult to photograph it standing, 
in that it starts to unfold itself. 
So this photo shows the card lying down flat.


An example of what happens when it is in the upright position:


To understand the mechanism of this card, 
I have photographed it with the top flap lifted up.


This next photo, although it looks a little wonky in the photo, 
depicts the card in its open state:


The next photo is taken in my Creation Station, 
and shows the freshly made card in an upright position:


And then lying flat:


Would you like to learn how to create a card with this type of fold? Read on for the tutorial!

SUPPLIES:
Soft Suede cardstock
A light neutral-colored recycled cardstock
Old Olive Designer Series Paper
Crumb Cake cardstock
Cajun Craze cardstock
Mossy Meadow cardstock

Arrange A Wreath stamp set

Mossy Meadow ink

Die Cutting/Embossing Machine
Taylor Made Tags dies (page 175, Annual Catalog)
Country Wreaths dies
Mossy Meadow Linen Trim
Stampin' Dimensionals

DIRECTIONS:
Cut a piece of Soft Suede cardstock to 4 1/4" x 11". Score it in the middle. Cut off 
2 1/2". To the narrow portion, add a 2 3/4" x 4" piece of light-colored neutral cardstock, and to this a piece of Designer Series Paper that matches the project, measuring 2 1/2" x 3 3/4". To the larger portion of this scored piece, add a 4" x 5 1/4" piece of the same DSP.

Cut another piece of Soft Suede cardstock that measures 3 1/2" x 10". Score it at 4". To the inside of this "card", add a 3 1/4" x 4 3/4" piece of the same light-colored cardstock.

Now we will work on the outside of this "card". Add a 3 1/4" x 4 3/4" piece of the light-colored cardstock once again.

Open up the larger of the cards. Adhere the back of the smaller card over the DSP in the large card. Leave approximately even margins at the top and the bottom. At this point, fold the smaller portion of the large card upwards, and the flap of the smaller card over that.

From Crumb Cake cardstock, use the Country Wreaths dies to cut a solid wreath, as well as one with open areas. Glue these two wreaths together. I couldn't seem to get them to match up, but it looks good anyway.

From Cajun Craze cardstock, die cut the bow using the same set. Also, cut two fronds from Mossy Meadow cardstock.

Put the wreath together and, using Stampin' Dimensionals, add it to the top of the outside of the second "card", leaving approximately equal margins at the top and sides.

About 1/4" - 1/2" from the bottom of the light cardstock, add a strip of the same DSP 
that measures 1 1/8" x 3".

From the light cardstock, use a die from the Taylor Made Tags dies to cut a tag that measures 3/4" x 2 1/4". Loop a piece of the Mossy Meadow braided trim through the hole on the left.

Stamp on the tag in Mossy Meadow ink a sentiment. Use Stampin' Dimensionals to add the tag to the DSP strip.


^^^^^^^^^^^^^^^^^^^^
Gratitude makes sense of our past, brings peace for today, 
and creates a vision for tomorrow.
- Melody Beattie -


^^^^^^^^^^^^^^^^^^

Thankful
Smiles.


January 28, 2023

FOXY HELLO

The stamp set I used in this card is from the LAST Sale-A-Bration. I thought this fox was quite exquisite. While I enjoy having fun with animals that are more cartoon-like, I am really drawn to wild animals that are a little more realistically rendered.

I must note that the colors in this card do not show up correctly, much to my chagrin. The card base is a cream color (!) and the textured panel above the fox is actually white cardstock. 


Because there are no bling-y embellishments on this card, it is very flat, which I love when I am putting a card in the mail. So yay!


I embossed the white panel with the Stripes and Splatters 3D Embossing Folder, found on page 177 of the Annual Catalog. This gives the card a more rugged woodsy feel, in step with the wildlife.

To complement that feel and to give it a vertical look, I wound Linen Thread around the right side of the fox panel several times. Adding a diecut "hello" on top of the Linen Thread gives the card a purpose -- just saying hello to the recipient.


I used Stampin' Blends SU 600 and SU 700 to color in the fox. Since he has a very sketchy appearance (I love that!), I took liberties with coloring him in, not being too careful.

After Mr. Fox was colored, I fussy cut him. I left the white border because I wanted to preserve all the sketchiness.


Do any of you recognize the really really old Old Olive Designer Series Paper on the fox panel? I still have a lot of it left. When searching through my DSP for a perfect background for the fox, I chose this from amongst the many I considered. I think it works very well. See? Something old . . .


^^^^^^^^^^^^^^^^^^^^^^^
Humankind must learn to understand that the life of an animal 
is in no way less precious than our own.
- Paul Oxton -


^^^^^^^^^^^^^^^^^^^^
Foxy
Smiles.


January 24, 2023

ADORABLE OWLS

January and February are Sale-A-Bration months with Stampin' Up! An exciting time that happens twice a year. Exciting because during this promotion customers have the opportunity to get freebies with a qualifying order! Yay! Who doesn't like free stamps, Designer Series Paper, etc.?

One of the products you can get for free with a $50 purchase is the really cute set called Adorable Owls. I do love any stamp that I can color in with my Stampin' Blends, and this set is one of them! So I'm in heaven!


My Adorable Owl all colored and fussy cut:


Read on for a tutorial on how to make this wonky birthday card featuring the bright blue-eyed Adorable Owl.

SUPPLIES:
White cardstock
Melon Mambo cardstock
Parakeet Party cardstock
Polka Dot Designer Series Paper

Adorable Owls stamp set (Sale-A-Bration brochure, page 4)
Many Messages stamp set

Memento Tuxedo Black Ink
Melon Mambo Ink
Stampin' Blends in: SU 1000, SU 600, Light Melon Mambo, Light Tahitian Tide, Dark Mango Melody,          Light Parakeet Party and Light Orchid Oasis

Die Cutting/Embossing Machine
Layering Ovals dies
Sequins
Stampin' Dimensionals

INSTRUCTIONS:
Fold a 5 1/2" x 8 1/2" piece of white cardstock in half, creasing it well with a bone folder.

To this card base, add a 4" x 5 1/4" piece of Melon Mambo cardstock. And to this, add a 3 1/2" x 4 3/4" piece of polka dot Designer Series Paper.

From Melon Mambo cardstock, die cut an oval that measures 3 1/2" x 2 5/8". Set at a wonky angle, add a 2 1/8" x 2 3/4" oval die cut from white cardstock..

Take a piece of Parakeet Party carstock and die cut another oval that measures 1 3/4" x 2 1/2". Inside that diecut oval place another die that measures 1 1/4" x 2 1/4", but not centered. We are capitalizing on wonkiness here. Cut out the center. Now the green oval should be a frame. Use pieces of Stampin' Dimensionals to adhere the frame, once again at a wonky angle on top of the white oval.

In Melon Mambo ink, stamp the sentiment towards the right side of the green oval.

On white cardstock, stamp the owl with the party hat in Memento Tuxedo Black Ink. Color him in as you with. See the Supplies list above for the Stampin' Blends colors I used in my sample. Fussy cut the owl, leaving no white border. With Stampin' Dimensionals, add the owl to the side of the sentiment. Add a couple coordinating sequins near the words.

Adhere this completed piece centered onto the card.


Please feel free to shoot me any questions about Sale-A-Bration!

^^^^^^^^^^^^^^^^^^^^^^
There was a wise old owl who sat in a tree; 
the less he spoke the more he heard; 
the more he heard the less he spoke. 
Why can't we be like that wise old bird in the tree?
 - Paul Ricoeur -


^^^^^^^^^^^^^^^^^
Wise
Smiles.


January 21, 2023

CELEBRATE BUTTERFLY

While many of the supplies used in this card are retired, the technique is still a winner, and anyone can have fun with it.

The star of the card is, of course, the decorative butterfly. To achieve this, find a stamp with lots of open line work -- think a coloring book. This butterfly stamp is ideal for the technique. Choose a piece of Designer Series Paper that would work well with what you picture in your mind.

In black ink, stamp your open image onto the DSP. I have bad arthritis in my hands, so I have trouble always getting a good even image. If you experience that also, just take a black marker and carefully go over the areas that need a little help.

Once the image is stamped to your satisfaction, carefully fussy cut it, cutting right up to the black stamped lines.


To create the antennae on the butterfly, I used some thin craft wire, shaping it into a "v" shape and taping the closed end to the back of the butterfly's head. 

The rest of the card involves lots of layering, and a bit of embossing.


Although it would be easy to recreate the card by simply looking at my sample, I will share a quick tutorial with you. Here goes.

SUPPLIES:
White cardstock
Real Red cardstock
Daffodil Delight cardstock
Choice of suitable Designer Series Paper

Black ink

Choice of large, open stamp (This butterfly is from Beautiful Day, retired)

Thin craft wire (if you're doing a butterfly)
Daffodil Delight ribbon
Die Cutting/Embossing Machine
Dot to Dot Embossing Folder (retired, but it can be replaced with any you choose)

DIRECTIONS:
Fold a 4 1/4" x 11" piece of White cardstock in half, creasing it well with a bone folder.

Run a 4" x 5 1/4" piece of Real Red cardstock through your embossing machine inside the embossing folder you've chosen. Adhere this embossed piece to the card base.

Adhere a 1 3/4" x 5 1/4" piece of Daffodil Delight cardstock to a piece of White cardstock that measures 2" x 5 1/4".

Stamp a sentiment in black at the far right side of a 1/2" x 5 1/4" strip of white cardstock. Adhere this strip to the yellow, about 1/2" from the top of the yellow. Right below the sentiment, add a piece of the yellow ribbon, taping the ends to the back of the panel.

Adhere this strip to the embossed piece aabout 1" from the top of the red.

Stamp in black ink the open image you selected onto the DSP. If any of the lines are a little inadequately stamped, fix that with a fine black marker. Fussy cut the image, cutting right to the black stamp lines.

If you have stamped a butterfly, cut a 2" piece of thin craft wire and bend it in half. Use tape to fasten it to the back of the butterfly's head. Trim the ends as needed to the right size for antennae. Bend the wires as desired.

With adhesvie on just the body of the butterfly, attach it to the yellow strip alongside the sentiment. Carefully tilt the wings upward to simulate flight.

^^^^^^^^^^^^^^^^^^^^^^^^

Happiness is like a butterfly: The more you chase it, the more it will evade you, but if you notice the other things around you, it will gently come and sit on your shoulder.

- Henry David Thoreau -


^^^^^^^^^^^^^^^^^^^^

Butterfly
Smiles.


January 17, 2023

MAPLE LEAF THANKS

I was so sad when Stampin' Up! announced that the lovely stamp set, Soft Seedlings, was going to retire when the Mini Catalog retired. The little helicopter seedlings that a maple tree drops have always intrigued me, and this set included a handful of them. Then, the large maple leaf was so exquisite and real looking. Hopefully you ordered it when you had the chance so you can make a card like this one.


Other than the two small embellishments on the sentiment strip 
and the texture created by the embossing on the background piece, 
this is a fairly flat card.


The colors are straightforward, a recycled neutral cardstock and Early Espresso.


Follow for a tutorial on how to make a card like this, provided you have the stamp set. Otherwise, another set with similar components will work equally well.

SUPPLIES:
Neutral Cardstock
Early Espresso Cardstock

Soft Seedlings stamp set (retired)
Painted Harvest stamp set (retired)

Soft Suede ink
Stampin' Blend in Dark Soft Suede

Die Cutting/Embossing Machine
Painted Texture 3D Embossing Folder (Page 177, Annual Catalog)
Seasonal Labels Dies (Page 174, Annual Catalog)
Basic Rhinestones
Stampin' Dimensionals

INSTRUCTIONS:
Fold a 5 1/2" x 8 1/2" piece of light-colored neutral cardstock in half, creasing it well with a bone folder.

Cut a 3 3/4" x 5" piece of Early Espresso cardstock. Emboss this piece with the Painted Texture 3D Embossing Folder. Add it to the card base.

Cut a 3 1/4" x 4 1/2" piece of the same cardstock as used in the card base. Onto this, stamp the large maple leaf from the Soft Seedlings set in Early Espresso ink.

Using the die that measures 3" wide and 4" tall from the Seasonal Labels set, die cut the leaf. With Stampin' Dimensionals, adhere this to the embossed piece with approximately equal margins at the top and sides.

From the card base cardstock, cut a strip that measures 1/2" x 3 3/4". On this strip, stamp your sentiment in Early Espresso ink. I used one from the retired Painted Harvest set. (Do you still have yours?) Using Stampin' Dimensionals, add the sentiment to the bottom of the card with 1/8" - 1/4" of brown showing at the bottom. 

Using the Dark Soft Suede Stampin' Blend, color two small Basic Rhinestones. After they have dried completely, add them on either side of the sentiment.


^^^^^^^^^^^^^^^^^^^^^^^
Maples are such sociable trees. 
They're always rustling and whispering to you.
- Lucy Maud Montgomery -


^^^^^^^^^^^^^^^^^

Maple
Smiles.


January 14, 2023

FLOWERS FLOWERS FLOWERS

Here I am, playing with Designer Series Paper again. I know, I do that quite often. 

I realize that I call my entire papercrafting/cardmaking process Creative Therapy. And that is definitely true. I just get lost in the process, and all my cares and negative thoughts go sailing away. Well, at least, while I'm creating. But it is always a nice respite from the cares of life, no matter how long -- or short -- it lasts.

If I am really down and don't have any creative ideas, however, what helps more than anything is the act of coloring in with Stampin' Blends any Designer Series Paper that is black and white.


This particular piece was busy busy busy. It took a loooong time to color it in. So, that provided a good break for me. 

I used Stampin' Blends in Light Old Olive, Dark Soft Seafoam, Dark Parakeet Party, Dark Pineapple Punch, Dark Mango Melody, SU 700, Light Pumpkin Pie and Light and Dark Flirty Flamingo. Yes, it is something of a fruit salad!


A closeup of the colored flora and the sentiment.


I love the sentiment (from Through It Together on page 69). It should really be my mantra. I wanted to do something extra besides having the sentiment way over to the right side. And I wanted the white strip to be the same length as the width of the colored portion.

After putting on my thnking cap, considering various options, I decided I wanted to use up the rest of the blank white space with two swipes of a gold cord. But, how to do that . . . I am sure lots of you have a method for doing just that, but I didn't.

I finally made a small hole in the strip right before the sentiment began. By threading a large needle with the length of gold cord, I was able to pull it through the hole, and secure it on the back with tape. 

However, the hole was unsightly.

I fixed that by tying a teeny bow from the gold cord and adhering it over the hole. 


To finish off the card, I adhered the colored piece to a 4" x 5 1/4" piece of Parakeet Party cardstock, since that is one of the colors I used, and added the whole thing to a Flirty Flamingo card base.

I don't think I am going to send this card to anyone. It is going to live in my work space to serve as a daily reminder.


^^^^^^^^^^^^^^^^^^^^^^^^^

Instead of worrying about what you cannot control, 
shift your energy to what you can create.
- Roy T Bennett, The Light in the Heart -


^^^^^^^^^^^^^^^^^^^

Worried
Smiles.


January 10, 2023

HOUNDSTOOTH CIRCLES

I love black and white (or black and  very vanilla in this case) Designer Series Papers for so many reasons. Throughout the years, you have seen me use it in a variety of ways.

In my stash for oh, so long, was a piece of black and cream DSP in a classic houndstooth design. I had come across it countless times, but it never struck me as terribly useful. Until . . . I had one of those aha moments!

Why couldn't I stencil over the design?


The brain neurons immediately went into action! It's so exciting when that happens. Time to experiment!

First I made my "stencil" by die cutting two different sized circles in a scrap of old paper. I cut the circles a little distance away from each other so my sponging wouldn't get in the way.

I used Real Red and Pacific Point ink with a Blending Brush to create overlapping circles all of this 4" x 5 1/4" piece of DSP. In color theory, blue and red blended makes purple, which wouldn't have been a problem. With these two particular hues of blue and red, the resulting purple was very muted and you have to consciously look for it to discover it. The resulting piece just basically looks like red and blue circles.


In this closeup of the sponging, the purple is a bit more apparent.


Because I completely fell in love with the look of this background, I decided to preserve and show it off as much as possible. This prompted me to choose a fairly simple finish to the card.

I used the wonderful "thanks" die from the Amazing Thanks dies, on page 169 of  the Annual Catalog. I cut the shadow portion of the word from black cardstock, and the main part of it from Very Vanilla, glued the two sections together, and added it to the lower portion of the card, a little right of center. I adhered the word with Mini Stampin' Dimensionals.


The final task was to adhere it all to a Pacific Point card base.

Let me know what you think of the card, and share whether you've ever done something like this with black/white or black/cream DSP. Do you do anything else special with this type of DSP?


^^^^^^^^^^^^^^^^^^^^^^^
Experimentation is a big part of how you find the best of the best.
- Kari Skogland -


^^^^^^^^^^^^^^^^^^^^^^

Experimental
Smiles.


January 7, 2023

RIP AND FLIP POPPIES

I send my deepest apprerciation and kudos to Jessica Taylor for sharing the wonderful technique I used in this card.

Stampin' Up! is well-known for their exquisite Designer Series Papers. There are so many times that I really love BOTH sides of a single sheet of DSP. Therein lies a huge problem. Which do I choose for my project? Or should I even cut it up at all and rather hoard it in my ever-growiing stash?

Well, Jessica in her wisdom, has solved the problem somewhat. She shares a technique she has coined Rip and Flip, in which you can enjoy BOTH sides of the paper in a single project!


Even if you decide to add to your stash, you can get away with parting with only a small portion of a lovely piece. In using your DSP in this way, you will need a piece that measures a mere 4" x oh, maybe 5 3/8". Then stick the rest of the sheet away.


A closeup of the meshing of the two sides of a piece of beautiful Designer Series Paper.


Even though it's a really easy technique to try, here is a tutorial on how to accomplish this look.

SUPPLIES:
White cardstock
Poppy Designer Series Paper

Die Cutting/Embossing Machine
Happy Birthday die
Basic Pearls (to dot the "i")

Yes! That's ALL you need to make this easy card!

DIRECTIONS:
This is honestly the EASIEST card you will ever make, but still looks like a million bucks!

Fold a 5 1/2" x 8 1/2" piece of white cardstock in half, creasing it well with a bone folder.

Cut a piece of gorgeous Designer Series Paper that looks good and coordinates well on BOTH sides. This piece should measure 4" x 5 3/8".

Holding this piece of DSP, tear off a section -- being sure to tear TOWARDS you. I tore off about an inch and a quarter. The reason you tear towards you is so you get that wonderful white torn edge.

Now, flip the torn-off piece over and add these two pieces to the card base, overlapping them a bit and keeping the white torn edge showing..

From white cardstock, die cut a small greeting. Add this to the smaller torn portion.


^^^^^^^^^^^^^^^^^^^^^^^

Joint undertakings stand a better chance 
when they benefit both sides.
- Eurpides -


^^^^^^^^^^^^^^^^^^^^^^

Both
Sides
Smiles.


January 3, 2023

#365birds NOVEMBER 2022

I have been a member of Terry Runyan's #dailycreating group for nearly 3 1/2 years now. Up until recently I had been pretty faithful about following Terry's daily prompts. While I am still a part of her wonderful family-like group in that I post every day, I am not following her prompts right now.

In fact, I am marching to my own drummer, #365birds. After finishing Birdtober, and enjoying it so very much, I decided to set a challenge for myself. I took a few days to compile a list of 365 birds from all around the world. I typed up, printed out, and cut each bird name into strips of paper which I threw into a large glass jar. Each morning, I randomly pick a name from the jar, and that is my prompt for the day. 

I started this on November 3, 2022. That means I will complete this challenge on November 2, 2023. Gulp. Today I drew bird 62. I haven't missed any days yet, and hopefully that will continue for all of the 365 days. 

This post will feature a handful of the birds I've drawn since my challenge started on November 3. As I always do, I will add the bird's name and pertinent information above each of the portraits.

day 5 - prothonotary warbler

southeastern ontario and eastern united states


day 6 - scale-feathered malkoha
philippines

day 10 - spotted pardalote
australia

day 11 - great horned owl
north america / south america

day 13 - sandhill crane
united states

day 16 - strawberry finch
india

day 17 - silver-throated tanager
costa rica / ecuador

day 18 - red-crested turaco
angola / southwestern africa

day 19 - purple finch
north america

day 20 = mandarin duck
far east

day 22 - golden-hooded tanager
southern mexico / western ecuador

day 26 - livingstone's turaco
sub-tropical lowlands of southeastern africa

day 27 - palawan peacock pheasant
philippines rainforest

day 28 - dusky lory
papua-new guinea and indonesia

Well, there you have a sampler of my November sketches. If you would like prints of any of my drawings, I am always open for that. Just let me know!

^^^^^^^^^^^^^^^^^^^^^^
Hold fast to dreams, for if dreams die, 
life is a broken-winged bird that cannot fly.
- Langston Hughes -


^^^^^^^^^^^^^^^^^^^^^^^

Dreamy
Smiles.