February 26, 2022

RAINBOW THANKS

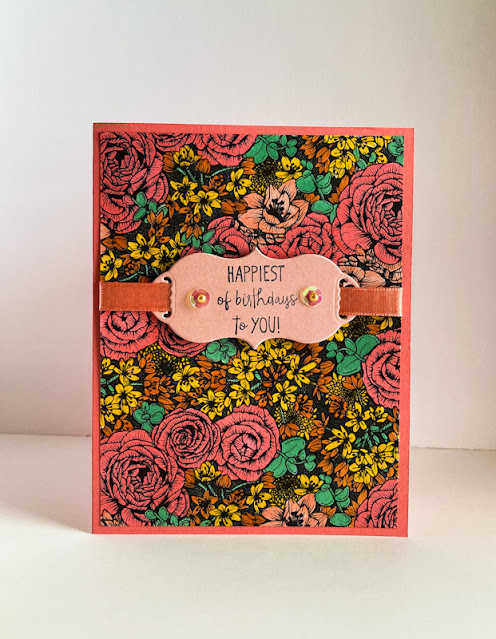
The pack of 6X6 Designer Series Paper, Sunshine & Rainbows, that you can get for free with a $50 purchase during Sale-A-Bration (which ends Monday, February 28!), has the most precious designs.

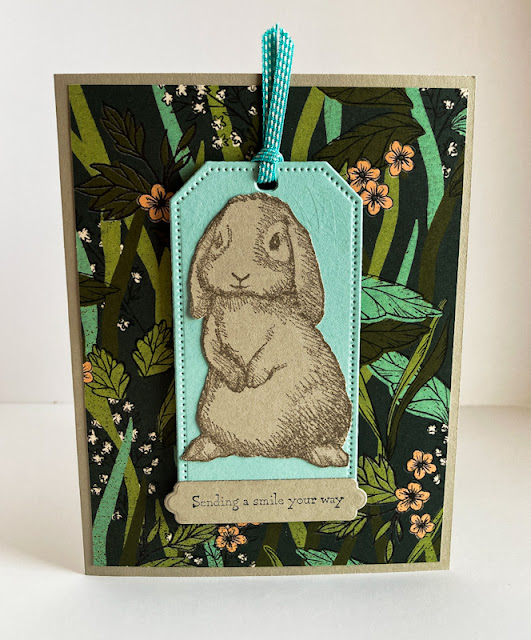
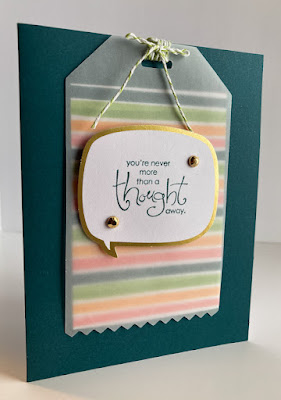
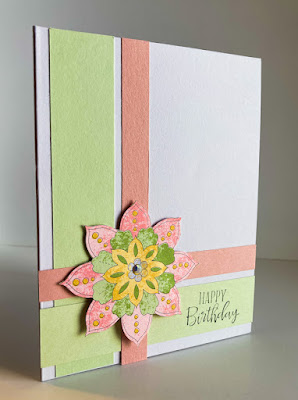
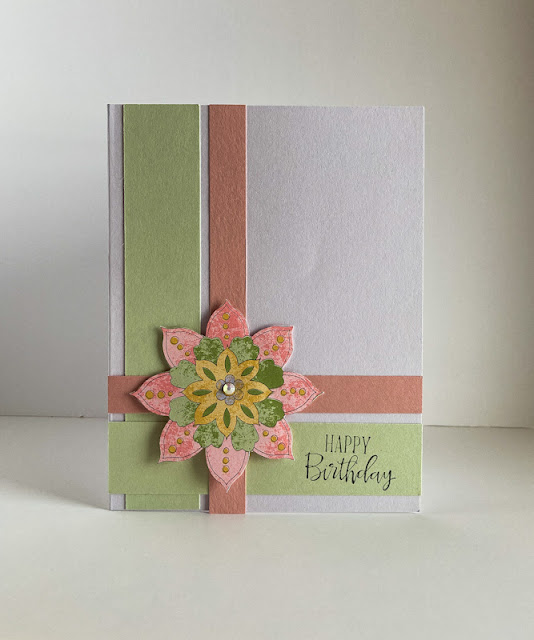
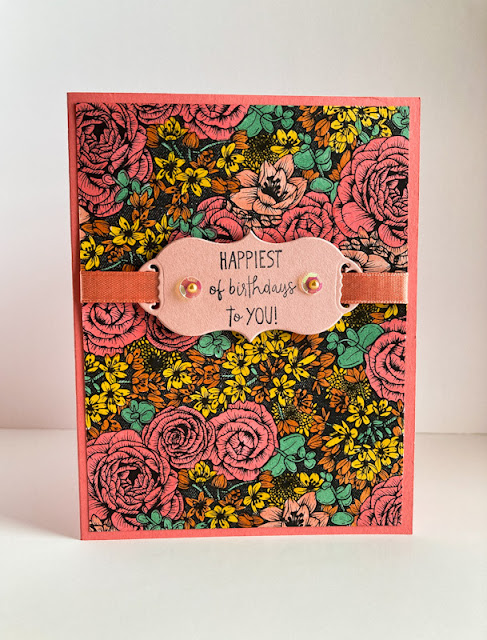
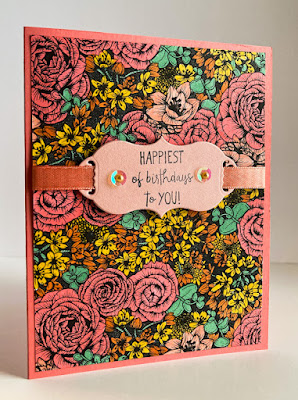
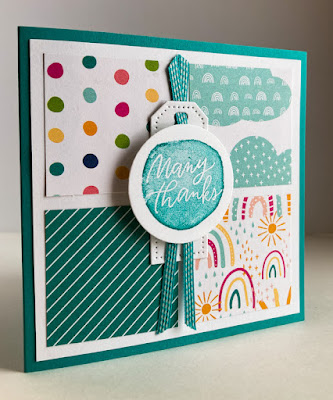
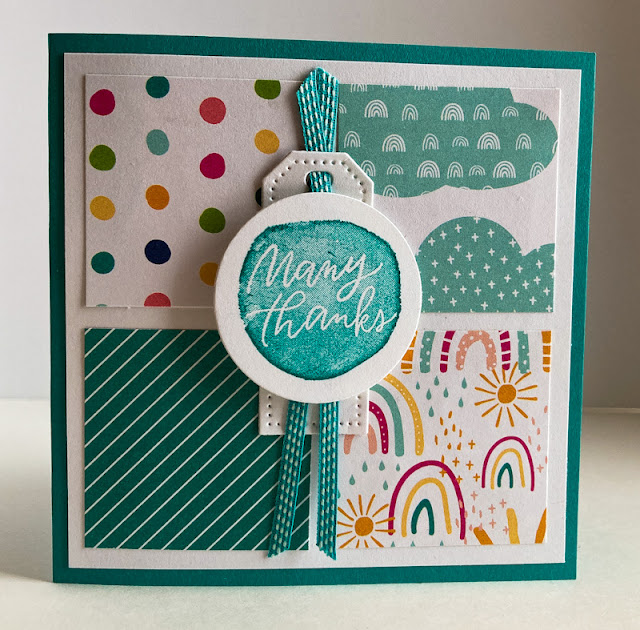
Because there are just so many cute designs, I wanted to create a card using more than one of them. And shown below is what I came up with. It is so bright and cheery. Don't you agree?


I wanted as much of the designs to show as possible, 
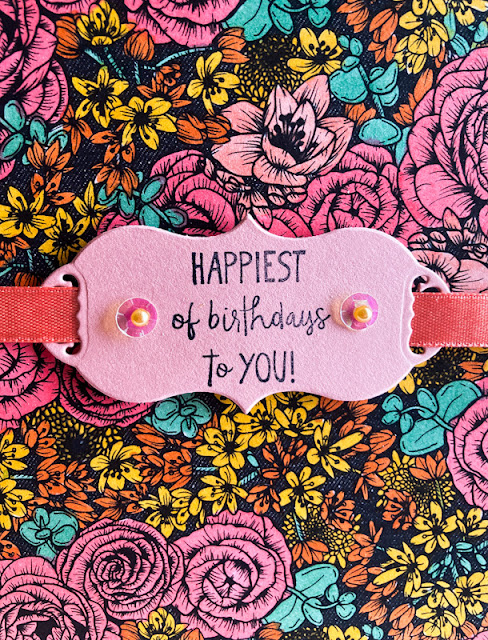
so I made my sentiment piece small and unimposing


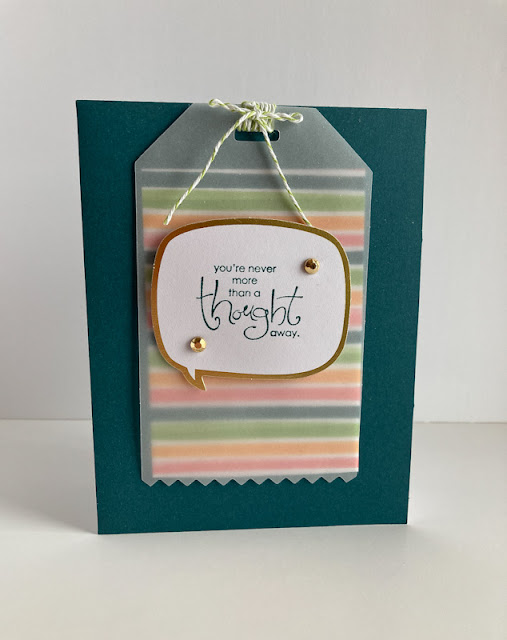
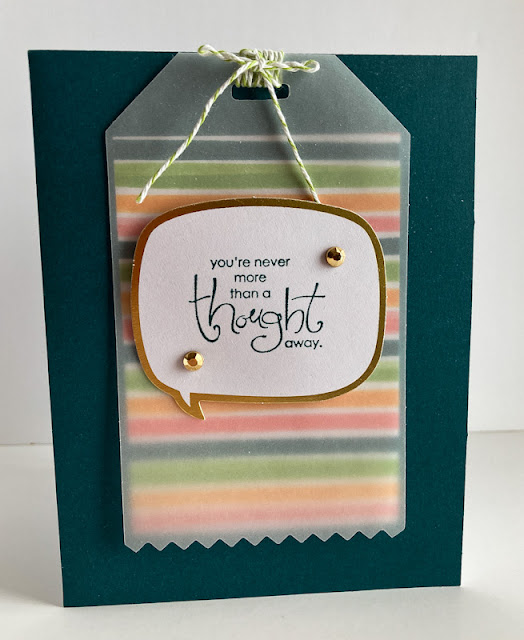
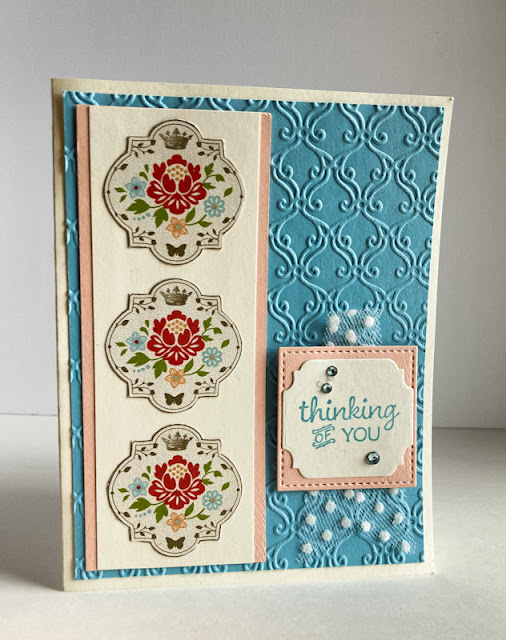
Following is a tutorial on how to make this 4 1/4" square card that fits nicely inside a standard A2 envelope.

SUPPLIES:
Bermuda Bay cardstock
White cardstock
Sunshine & Rainbows  Designer Series Paper (Sale-A-Bration Brochure, page 8)

Lucky You stamp set (Mini Catalog, page 67)

Bermuda Bay ink

Die cutting machine
Tailor Made Tags Dies (Annual Catalog, page 166)
Layering Circles Dies (Annual Catalog, page 163)
Bermuda Bay ribbon
Stampin' Dimensionals

INSTRUCTIONS:
Fold a 4 1/4" x 8 1/2" piece of Bermuda Bay cardstock in half, creasing it well with a bone folder.

Cut a 4" square of white cardstock. To this, add evenly spaced four 1 3/4" squares cut from the Sunshine & Rainbows Designer Series Paper. 

Add this finished portion to the card base.

On a scrap of white cardstock, in Bermuda Bay ink, stamp "Many Thanks" from the Lucky You stamp set. Die cut this piece with a 1 5/8" circle from the Layering Circles die set. 

Also from white cardstock, die cut a tag measuring 7/8" x 2 1/4" from the Tailor Made Tags Dies set.

Cut two pieces of a coordinating 1/8" wide ribbon that measure 3 3/4", angle trimming the ends. Thread the two top pieces of ribbon through the hole in the tag so the ends are behind the tag, extending about 1/2" from the top of the tag and letting the remaining ends dangle. Tape them in place so they stay put as you want them.

With Stampin' Dimensionals, adhere the sentiment to the tag/ribbon combo.

Add this section flat, centered vertically, to the card.


Rainbow
Smiles.


February 22, 2022

SAD BUNNY

Is it just me -- or do you agree that the expression and the eyes on this bunny make him look so sad?

Anyway, in my head, since that's how I thought he looked, I figured he would be a good one to add to a card to send some cheer to a person who could use a good smile. Like me, for example.


Our sad little bunny is set onto a cute stitched tag with coordinating ribbon, and then popped against some of the pretty paper from Sale-A-Bration, Daffodil Afternoon. I love the way this DSP makes our bunny look as if he's sitting amongst the flora in a garden. 


Read on for a tutorial on how to make this quick and easy card to ease someone else's day.

SUPPLIES:
Sahara Sand cardstock
Pool Party cardstock
Daffodil Afternoon Designer Series Paper (Sale-A-Bration, page 4)

Gray Granite ink (although perhaps black ink would have shown up better)
Black ink

Easter Friends (Mini Catalog, page 27)
Many Messages (Annual Catalog, page 42)

Die Cutting Machine
Seasonal Labels dies (Item #156299)
Tailor Made Tags dies (Annual Catalog, page 166)
Bermuda Bay Ribbon
Stampin' Dimensionals
Paper Snips

INSTRUCTIONS:
Fold a 5 1/2" x 8 1/2" piece of Sahara Sand cardstock in half, creasing it well with a bone folder.

To this card base, add a piece of wild garden Designer Series Paper that measures 4" x 
5 1/4". Set aside for now.

In Gray Granite ink, stamp the sad-looking bunny. Fussy cut him. He is easy to cut out.

From Pool Party cardstock, die cut a tag that measures 2" x 3 1/2" using the Tailor Made Tags dies.

Insert a piece of Bermuda Bay ribbon through the hole in the top of the tag.

Glue the fussy cut bunny to the tag.

From Sahara Sand cardstock, die cut a label using the Seasonal Labels dies. This label measures about 2 1/2" x 1/2". In black ink, stamp your sentiment. I thought the bunny could use some or offer some cheering up, so that's why I chose the sentiment I did.

Adhere the sentiment to the bottoom edge of the tag.

Use Stampin' Dimensionals to add the tag centered on the card.


Sad
Smiles.


February 19, 2022

VELLUM TAG

We cardmakers are all well aware of how much of a challenge working with vellum can be. 

Its translucence is the single thing that poses the biggest problem in that almost nothing works when trying to adhere the vellum to another surface. In my experience, I have never come upon a product that doesn't show through the vellum, even adhesives that are meant specifically for use with vellum.

That's why I always welcome any tricks I come across for the adherence of this fussy component.

Recently, putting together a card from an old Stampin' Up! kit gave me just such a wonderful solution. 


The secret is the fancy-ness with baker's twine at the top of the vellum tag. Do you see that the twine was wrapped several times through the hole at the top of the tag and then finished with a bow? What a perfect way to disguise the presence of adhesive!


After adhering a striped piece of cardstock to the cardstock base, I added a glue dot to the back of the baker's twine and added the tag to the top of the card.

You can see in the photo below, when I slide the tag to the side a bit, the colorful stripes below. But, since vellum is translucent, it lets the print show through, however subtly. 


The sentiment I stamped on the gold foil edged tag is from a forever ago Sale-A-Bration stamp set. I still love it and use it quite frequently. The words speak so eloquently.

Adding a couple of Gilded Gems (page 142, Annual Catalog) to the tag echoes the gold trim of it nicely.


Do you have any vellum adhering tricks you could share with us to make our lives easier?

Vellum
Smiles.


February 15, 2022

CRISS CROSS BIRTHDAY

Once again, my card features something that I'd fussy cut from a pretty sheet of Designer Series Paper. The flower, the focal point, is the item to which I am referring.


Since the flower was soft and simplistic, I decided to create the rest of the card to follow in its footsteps. A few cardstock strips, a neat sentiment and a single piece of bling were all that was needed to complete the card.


SUPPLIES:
White cardstock
Blushing Bride cardstock
Soft Seafoam cardstock
Flowers fussy cut from retired Designer Series Paper

Peaceful Moments stamp set (page 24, Annual Catalog)

Memento Tuxedo Black Ink

Stampin' Dimensionals
Basic Rhinestone
Paper Snips

DIRECTIONS:
Fold a 5 1/2" x 8 1/2" piece of white cardstock in half, creasing it well with a bone folder.

From Soft Seafoam cardstock, cut a strip that measures 1" x 5 1/2" and another that measures 1" x 4 1/4". Then, from Blushing Bride cardstock, cut one piece that measures 1/2" x 5 1/2" and one that measures 1/2" x 4 1/4". On the card base, arrange these two strips criss crossing them as you wish, with the thinner strips towards the center, and adhere them in place.

From a piece of Designer Series Paper that features good sized flowers, fussy cut one of the flowers. (Of course, be sure to match your cardstock strips to the colors of the flowers you choose!) With Stampin' Dimensionals, add this to the intersection formed by the colored strips.

REMINDER: If your chosen DSP does not feature these two colors, change up the colors of the cardstock strips to coordinate with your flower.

Add a rhinestone to the center of the flower.

In black ink, stamp a sentiment on the lower right portion of the Soft Seafoam strip.


Fussy
Smiles.


February 12, 2022

ENZO'S UNDERWATER BIRTHDAY

Our precious grandson, Enzo, turned 5 this week. He, like so many other little boys, loves such things as sharks, dinosaurs and PJ Masks. 

He just got over COVID, and, since his mom works from home, I kept him busy several hours each workday by reading, drawing and watching "bideos". That was a technical trick I was able to set up. Finding this type of subject matter on YouTube, I had the "bideo" on the computer screen and set my iPad in front of it with the camera reversed so he could see what was on the computer. 

We spent literally hours doing this. And he was completely happy. So was I because, even though he couldn't see me, I could watch his adorable face the entire time.

With this type of subject matter in mind, I decided to make him a birthday card featuring an underwater scene. He had to imagine the sharks lurking nearby, but he seemed to have to problem with that.


I used lots of dies, embossing folders and colors to depict this underwater scene. 
It was so much fun to put together, knowing he would love it.


Since he was recovered from COVID by the time his birthday rolled around, I was told by our County Health Department that he had immunity for 90 days. Yay! His mom was hostessing a birthday party at a local pizza place, and we were invited. But several of the attendees were not vaccinated, so we opted to have our own little party for him at our house before his official one.

My husband and I picked him up from 4K and brought him to our house to open his gifts from us. We had a great time with him, feeling safe the whole time. 

I love spending time with this wonderful little boy, and I miss the in person stuff so much. This was a momentous time for all three of us.

Shown below, he is opening his card.


I created the inside to continue with the underwater theme by die cutting a series of waves, which I proceeded to overlap to give the impression of more of the ocean, adding a few of the weeds and the crabby guy at the bottom.

Very unsure at that point how to finish it off, I put it aside for a few days. What I finally decided to do was die cut some more waves in a white cardstock, and I tucked the edges of these waves into a couple of the blue waves. That was where I added the sentiment and our names. I think it turned out well.


The next photo shows him sitting at our house, looking fairly serious. 


I think Enzo enjoyed his little party with us, including all the boy presents we gave him. I know we both enjoyed have him with us for a brief time!


Enzo almost always has a huge smile, so I thought I'd include the photo below 
so you can see the face we usually see. 


Happy Birthday, Enzo!

Underwater
Smiles.


February 8, 2022

HAPPIEST FLOWERS

 Here I am again, talking about just how much I love using my Stampin' Blends on Designer Series Papers. The DSP I used for this card happened to be black and white. So I literally started from scratch in adding my colors. Which is great, because in doing that, I'm free to choose my own color scheme.


A photo of the finished card sitting atop 
a piece of the uncolored Designer Series Paper:


The black and white paper was excruciatingly busy and condensed. It took quite awhile to color in this detailed monstrosity. I wanted to keep the piece fairly warm, but added in a bit of green here and there to tone down the warmth with a little coolness.

For my Stampin' Blends, I used Dark Pumpkin Pie, Dark Flirty Flamingo, Light Calypso Coral, Light Just Jade and Dark Daffodil Delight. 

The sentiment -- isn't it cute?? -- came from the All Squared Away stamp set, found on page 117 in the Annual Catalog.


Notice my bling -- I added Gold Metallic Pearls to the center of sequins. I love the way it looks.

The label, die cut from a retired die set, featured those cute decorative slots on either side into which I threaded a cool piece of ribbon.

A super closeup of the coloring


While I love the completely black and white look, even for an entire card, I was compelled to do some detailed coloring for this card. And I'm really glad I did.


Would you have left this Designer Series Paper as it is, all black and white? Or would you have elected to have a little stress freeing time by coloring it in? Do you enjoy detailed coloring?

Happiest
Smiles.


February 5, 2022

USE YOUR DSP

Any of you who have been following my blog for awhile know that I simply love to fussy cut. Maybe some of you don't know what I mean when I say "fussy cut". It's exactly what it sounds like: very close intricate cutting. It's so satisfying and the results can be stunning.

Stampin' Up! has some wonderful DSP -- Designer Series Papers -- that are not also wonderful for the traditional use of scrapbooking, but I find them so useful in card making.

Sometimes a DSP design has very distinctive portions that are easily separated from the rest of the piece and used in a completely different way than just cutting a portion to a 4" x 5 1/4" piece as a background for a card. Or something of that sort, where you use the piece as it's meant to be used.

In my card today, that's exactly what I did. The DSP I used has been retired for ages, but I love the medallion sort of designs that I fussy cut and used as separate components on my card. They can be seen in the row along the left side.


For the rest of the card, I picked up coordinating colors that appeared in the fussy cut pieces. In this case, it was Blushing Bride, Very Vanilla and Balmy Blue. I even colored a trio of Basic Rhinestones in Balmy Blue Stampin' Blend Marker to finish it off.

The embossed Balmy Blue portion was done with an old retired embossing folder, but I love how it almost mimics the shape of the fussy cut pieces.

A couple little die cuts with a sentiment stamped in Balmy Blue, atop a folded over piece of the Very Vanilla dotted ribbon balanced the look.


Have you ever cut up a piece of Designer Series Paper to use in your cardmaking -- or even in your scrapbooking? I never regret doing this and am always always pleased with the results you can get.

If you haven't ever given this a try, why not now? There are endless possibilities!


Fussy
Smiles.


February 1, 2022

#dailycreating SEPTEMBER 2021

I certainly must have been a real bird brain when doing my #dailycreating drawings for September. You see, every drawing that I show you in this post is a portrait of a BIRD! I truly love trying to capture the personality of birds. Even the birds of prey have their own loveliness.

As members of the Facebook group #dailycreating, hostessed by artist Terry Runyan, we are encouraged to do some sort of creating, whatever strikes our fancy, each day. I originally joined this group more than three years ago to work on improving my drawing. So, that's mostly what I do.

Lately, however, the Pandemic is taking its toll on my emotional state, and often I find it almost too much to think about drawing. So, occasionally I do miss a day, much to my chagrin. 

Each Sunday afternoon, Terry posts a list of optional prompts for the coming week. This is another thing that I have veered away from at times, especially recently. I feel badly about that. But, my interest for awhile now has been more or less serious drawings of wildlife. If a prompt seems to fit along those lines, I gladly embrace it. If I feel up to drawing.

I guess September found me embracing the world of birds. So, I present to you 15 of the bird drawings I feel are adequate to share with the public. As I've done all these months, I will include above each image the prompt and any other pertinent information about my subject matter.

#thing on thing

livingstone's turaco, africa


#birdurday
saker falcon, southeast europe/asia

#thing on thing
victoria crowned pigeon, new guinea

#mulberry
glossy ibis, north american atlantic coast/ west indies

#indigo
indigo bunting

#aqua/oyster shell
lilac-breasted roller, africa

#oyster shell
himalayan griffon vulture

#cantaloupe/kohl
dusky lorikeet, new guinea

#powder blue
parakeet

#chocolate/powder blue
peregrine falcon

#peacock

#thing on thing
brahminy starling, thailand

#saffron
saffron toucanet, south america

#cornflower
blue vanga, madagascar

#pink salt
major mitchell's cockatoo, australia

Obviously I was thrilled with all the color prompts. It was so easy to do a search for birds of a specific color. Great fun!

For Wednesdays, #thing on thing day, I always choose to draw a bird with something extraneous on the head, such as plumage, messy hair, or even something weird on its beak.

Also, Terry had originally dedicated Saturdays to #caturday, after awhile adding #dogurday. Some time ago, she finally added as a possibility #animal-urday. Once again, lots of fun for me.

Please don't print or copy in any way my original artwork. Contact me if you would like a print. Thanks for your respect in this regard.

Stay tuned for October #dailycreating in about a month. In the meantime, please stay safe and healthy.

#dailycreating

Smiles.