December 20, 2022

MERRY SNOWFLAKE

Do you have any Stampin' Up! Glimmer Paper in a bluish tone? Do you have a beautiful detailed snowflake die?

Combine the two to make a stunning, but easy card!


To add interest to an otherwise boring piece of white cardstock for the snowflake to rest upon, I used a retired snowflake embossing folder on a 4" x 5 1/4" piece of white cardstock. Once it was embossed, I gently sponged Coastal Cabana ink over the raised surface of the snowflakes. This seemed to bring it all together, and add a bit of interesting dimension.


To complete this lovely snowflake, I added an Iridescent Rhinestone to the center of it. 
I love the way the rhinestone picks up the glorious Coastal Cabana color 
and looks as if it truly is a part of the snowflake.


Here in Wisconsin we are getting snow dumped on us regularly. I know it's not nearly what some parts of the country have been experiencing, but we definitely are getting our share, with more to come.. Truthfully, all this snow has made the outside look like a winter wonderland. The trees are so gorgeous, especially when the sun shines on them, making the snow glisten. It simply takes one's breath away. We will definitely be having a white Christmas!


^^^^^^^^^^^^^^^^^^^^^^^^^^

The snow is sparkling like a million little suns.
- Lama Willa -


^^^^^^^^^^^^^^^^^^^^^^

Snowflake
Smiles.


December 17, 2022

JINGLE BELL ROCK

One of my all-time favorite seasonal songs is Sleigh Ride by Leroy Anderson. I have loved it since I was in high school -- simply AGES ago! -- when we played it in Concert Band. What a fun spirited piece!

I know it's retired now, but I love the Sounds of the Season dies because the set included a couple of jingle bell dies, reminding me of Sleigh Ride. I used one of the jingle bells in a pure white cardstock for this card, centering it in the middle of one of the three cute seasonal-flavored hexagons I made using the Beautiful Shapes dies.


Beccause the top portion of this card was so interesting, I decided to tone it down for the "merry" portion across the bottom. But the plain flat red cardstock was just that, plain and flat. It definitely needed some pizzazz!  So I embossed it with a script folder. Much better!


Here you go: A Tutorial!

SUPPLIES:
Garden Green cardstock
Real Red cardstock
White cardstock
Assorted scraps of Christmas Designer Series Papers

Die Cutting/ Embossing Machine
Red and White Baker's Twine
Stampin' Dimensionals
Christmas Greetings Thinlits dies 
Beautiful Shapes die set (page 169,  Annual Catalog)
Sounds of the Seasons die set
Script Embossing Folder
White sequins

DIRECTIONS
Fold a 5 1/2" x 8 1/2" piece of white cardstock in half, creasing it well with a bone folder.

Cut a piece of Real Red cardstock to about 2" x 5 1/4". Emboss this piece with a suitable embossing folder. You just want texture for interest, not a big overwhelming embossing. I used the Script embossing folder.

Adhere this to the card front, leaving even margins on the bottom and the sides. Set this aside for now.

Cut a piece of Garden Green cardstock to 2 1/4" x 5 1/4". To this, add a 2" x 5 1/4" piece of white cardstock. Adhere this to the card base, leaving even margins at the top and the sides. It may overlap the red piece a bit. That's fine.

Using the hexagon die that measures 1 1/2" from top to bottom and the die that measures 1 1/4" from top to bottom, cut three hexagons from an assortment of Christmas Designer Series Paper. This is a wonderful way to use up some of those small scraps left over from previous projects! Cut two small and one large hexagon. With the large one in the center, adhere these three hexagons to the white piece.

From white cardstock, use the retired jingle bell die to cut a bell.

Thread a piece of red and white baker's twine through the hole at the top and adhere this to the center of the large hexaagon with a Stampin' Dimensional.

From white cardstock, die cut the word "merry". Using very little green glue, add this word to the center of the red embossed piece. Add sequins to the beginning and end of the word.


^^^^^^^^^^^^^^^^^^^^^^^^^^^^^^

To appreciate the beauty of a snowflake it is necessary to stand out in the cold."

- Aristotle -


^^^^^^^^^^^^^^^^^^^^^^

Jingle
Smiles.


December 13, 2022

PEACEFUL STARS

Although it's not quite apparent in these photos, the colors in this card are actually a brushed copper and Night of Navy. 

When the Decorated With Happiness stamp set arrived in the latest Mini Catalog, I found myself immediately smitten. When joined up with the coordinating dies, Decorated Pine Dies, in my eyes, this was a sure winning combination. 

Apparently Stampin' Up! customers and demonstrators didn't have the same warm feelings for these pieces as I do, because it is all going the way of retirement! I am bereft. Well, I guess it will be more of those things that I fell in love with and will never fall out of love with, because -- I plan on using it all forever and ever.


The following photo shows the beautiful colors better than the other two.

On Night of Navy cardstock, I embossed the thrree ornaments in copper embossing powder. I also cut the <long retired> word from the same beautiful cardstock I used for the card base. I just happened to have some coppery stars in my stash that I'd gotten on the Clearance Rack, and they were so perfect to finish the card off. Oh! And the pretty copper stars on navy was a piece of Specialty Designer Series Paper from last year.


Here's how to pull together a card like this one:

SUPPLIES:
Night of Navy cardstock
Brushed copper cardstock
Specialty Designer Series Paper

Decorated With Happiness stamp set (Page 27, Mini Catalog -- grab it before it's retired!)

Die Cutting/Embossing Machine
Christmas Greetings Thinlits Dies (retired)
Heat Tool
VersaMark ink
Embossing Buddy
Copper Embossing Powder
Copper Adhesive-Backed Stars

DIRECTIONS:
Fold a 5 1/2" x 8 1/2" piece of brushed copper cardstock in half, creasing it CAREFULLY with a bone folder.

Cut a piece of Night of Navy cardstock to 2 1/4" x 5". Rub an Embossing Buddy well over the whole piece. In VersaMark ink, stamp the three ornaments from the Decorated With Happiness stamp set, evenly spaced. With copper embossing powder, emboss the ornaments. Adhere this embossed piece to the copper card base, leaving even margins at the top and the sides.

Cut a piece of the Specialty Designer Series Paper to 1 1/4" x 5". Adhere this to the card base, leaving an equal margin at the bottom as the piece on top.

From the same copper cardstock, die cut the word "peace", using the retired Stampin' Up! die set. Use glue sparingly on the back of the word and add it centered on the starry DSP piece.

Add three adhesive-backed copper stars to the top portion around the ornaments.


^^^^^^^^^^^^^^^^^^^^^^^^

Saying no can be the ultimate self-care.
- Claudia Black -


^^^^^^^^^^^^^^^^^^^^^^^^^^^^^

Peaceful
Smiles.


December 10, 2022

ORIGAMI TREE

I am sure you've seen these cute little origami trees, probably many times, in the past. However, have you ever attempted to make one?


The trees themselves don't have a lot of dimension, 
so would be good for mailing without extra postage. 
I always appreciate that!


A closeup of my origami tree:


If you're interested in making a tree or two for yourself or someone else, but aren't sure how to proceed, here is a tutorial I've made up to hopefully help make it easier for you. Once you get the hang of it, you will find yourself making little forests of these little cuties. They are lots of fun to grow. I mean, make!

The Supplies List and Tutorial are to make a card like mine. Change it up however you want. Make yourself happy!

SUPPLIES:
Christmas-flavored Designer Series Paper or scrapbook paper
Very Vanilla cardstock
Real Red cardstock
Shimmer gift wrap (I found this at Target)

Bone Folder
Small star punch
Green sequin
Stampin' Dimensionals
Glue Dots

INSTRUCTIONS:
To make the tree portion, you will need four squares of the same DSP that measure 3", 
2 1/2", 2" and 1 1/2". You can actually start with any size you want; just keep decreasing by 1/2". You could also make more or less layers to change the size of your tree.

So far, so good??

Fold the first square from corner to corner; unfold, and fold from the other corner to corner. Open. Fold it in half. Open. Fold in half the other way.

Stick with me!

Hold the open paper print side out to you. See the line that runs across the square horizontally? Push that line in on both sides of the center. Fold it together and flatten it so you have a triangular shape. Bring the bottom of the top point to the center fold line and crease. Repeat with the other side. Use the bone folder to flatten this piece. This is your first layer of the tree.

Going good?

Repeat these steps with all four pieces. Set aisde while you make your card base.

Fold a 5 1/2" x 8 1/2" piece of Very Vanilla cardstock in half, creasing well with a bone folder.

Add to this base a 3 3/4" x 5" piece of the sparkly gift wrap.

Start with the largest tree piece. Put a few Glue Dots across the bottom, leaving the point with NO GLUE DOTS, and add it to the card front.

When you are placing these layers, try to line up the creases as well as you can.

Slide the next largest tree piece near the top point of the preceding piece, doing the same thing with Glue Dots across the bottom. Continue in this same fashion until your tree is complete.

Punch a star from Real Red cardstock. Adhere it to the top of the tree with a piece of Stampin' Dimensional.

Add a green sequin to the center of the star.

How did that go? Are you ready to create a forest?


^^^^^^^^^^^^^^^^^^^^^^^

The world of reality has its limits; 
the world of imagination is boundless.
- Jean-Jacaques Rousseau -


^^^^^^^^^^^^^^^^^^^^^^^^^

Wintry
Smiles.


December 6, 2022

ORNAMENT TUTORIAL

I have some of my work -- prints, bookmarks, and now, for Christmas, ornaments -- for sale at a wonderful little local boutique. All of the ornaments I share with you in this post are in this shop. 

For someone with arthritis in her hands, these ornaments are a little difficult for me to make, but the end results make the struggle so worth it. 

If you have a couple open ornament dies, you could easily make ornaments like these. After you've looked through a handful of my ornaments, I will give you a photo-full tutorial on how to make the ornaments on your own. 


There! Now that you've had a little sneak peek of what we'll be making, I will commence with the tutorial, which will demonstrate how to make the second ornament that I've shown you above.

Choose your die and cut six of the shapes. If, like this ornament, it has a design that needs to be all the same direction, pay close attention to this. Hearts are most desirable when they are all facing the same upright way. So, when you are cutting the ornament pieces, be very aware of this direction when laying out your dies on the paper.


Fold all six pieces in half, from top to bottom,. If you don't do a good job of matching the edges exactly at this stage, you will run into problems. Use a bone folder to crease each one well.


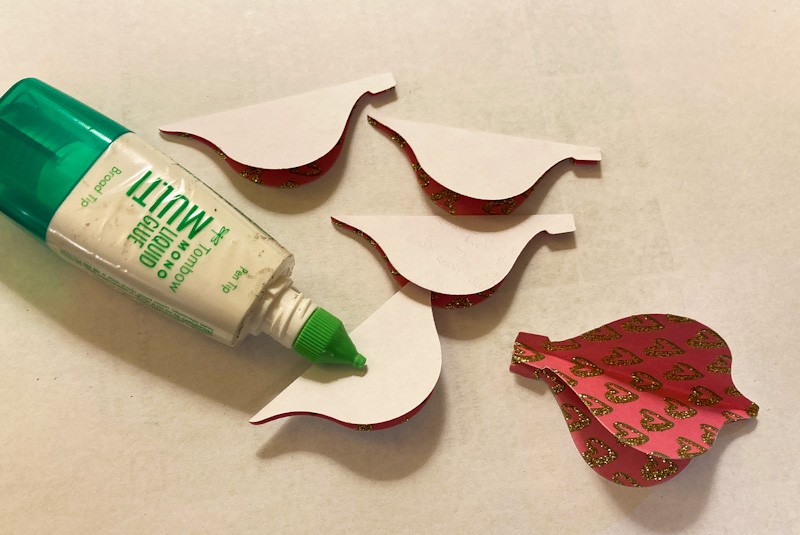
Put glue on one side of one of the folded pieces and match it to the same side of the next piece. Continue in this way until they are all attached together, EXCEPT FOR JOINING THEM COMPLETELY TOGETHER.


This photo shows all of the initial gluing finished, waiting for the next step.


Turn it so the joined folds are facing up. Run liquid glue up this area.


After cutting a piece of metallic twine to about 6" or so, fold it in half and rest the two ends together along this glue line, making sure it stays in place.


Add a bit of tape of the top part of it, pressing the tape into the groove, just as extra reinforcement so the metallic hanger doesn't pull out of place.

This next step, to me, is the most challenging, with my hands and lack of strength. Put glue on one of the remaining pieces, and lining the two sections up together as perfectly as you can, close up your ornament. I make sure I hold it a few beats so the glue catches really well. I even lay the ornament down and burnish the edges with the bone folder. You don't want all your work to fall apart!


Certain papers, when put together in this fashion, show a white edge. If that happens with your ornament, and it bothers you, grab an ink color that matches the main color of your ornament as well as possible.

Using a stampin' sponge, carefully sponge the ink along the edges to cover up the white.


Yay! Your ornament is ready to find a place on your tree!


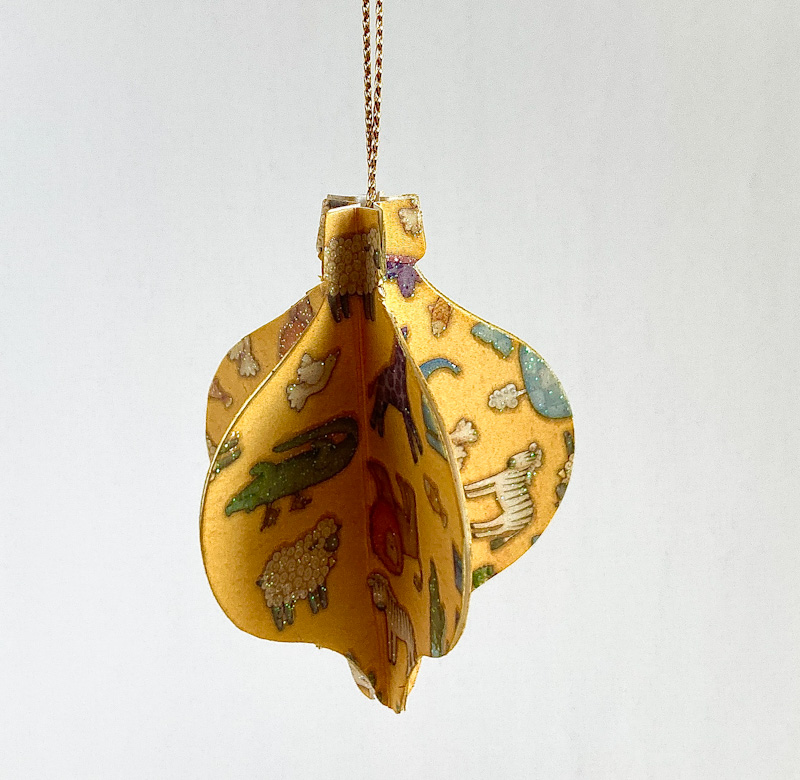
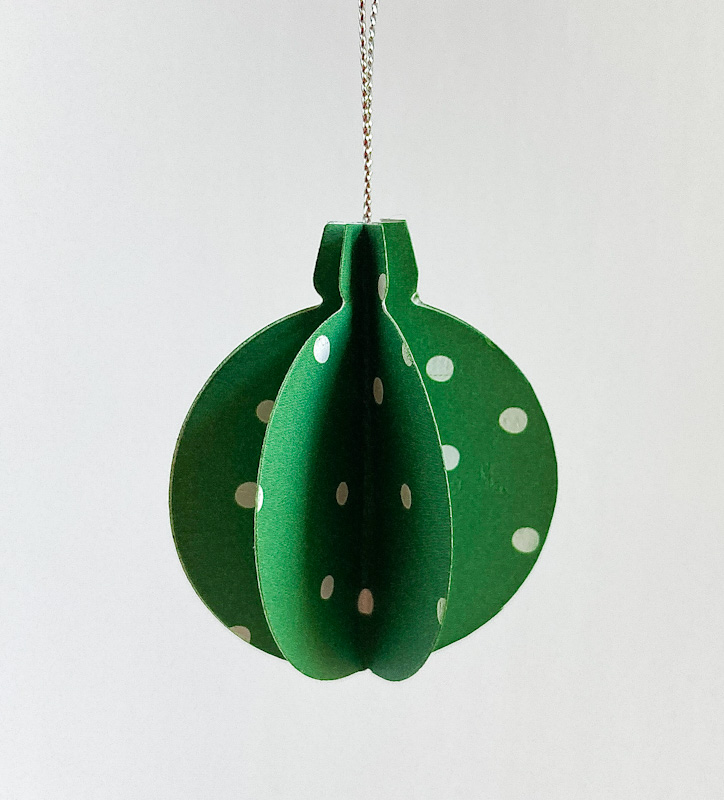
And, now, I'll share the rest of the ornaments with you. You can see that most of the time the papers I used weren't even Holiday flavored. They look beautiful and festive anyway! So, if you have fairly stiff designed paper, almost anything will work. Just have fun with this!


The ornament below almost killed my hands. It was especially thick and the designs were even thicker, almost an embossed feel. I was glad when this one was finished. If you have hand strength problems, be aware of this!


^^^^^^^^^^^^^^^^^^^^^^^^^^

We are the hero of our own story.
- Mary McCarthy -


^^^^^^^^^^^^^^^^^^^^^^^^

Ornamental
Smiles.