
Do you love the old-fashioned classic look of pressed metal? I do!
Follow along with me in this blog post to discover how you can mimic this look for use in greeting cards!
The photo below shows an example that I made with this method:

Each piece that you make with this technique has both a shiny shiny side as well as a more subtle matte finish side. Both of the looks are wonderful.
Whichever you decide to use in your cardmaking though is completely
a matter of taste and preference.

Or, maybe the card that you are creating would simply look better
with either one or the other.

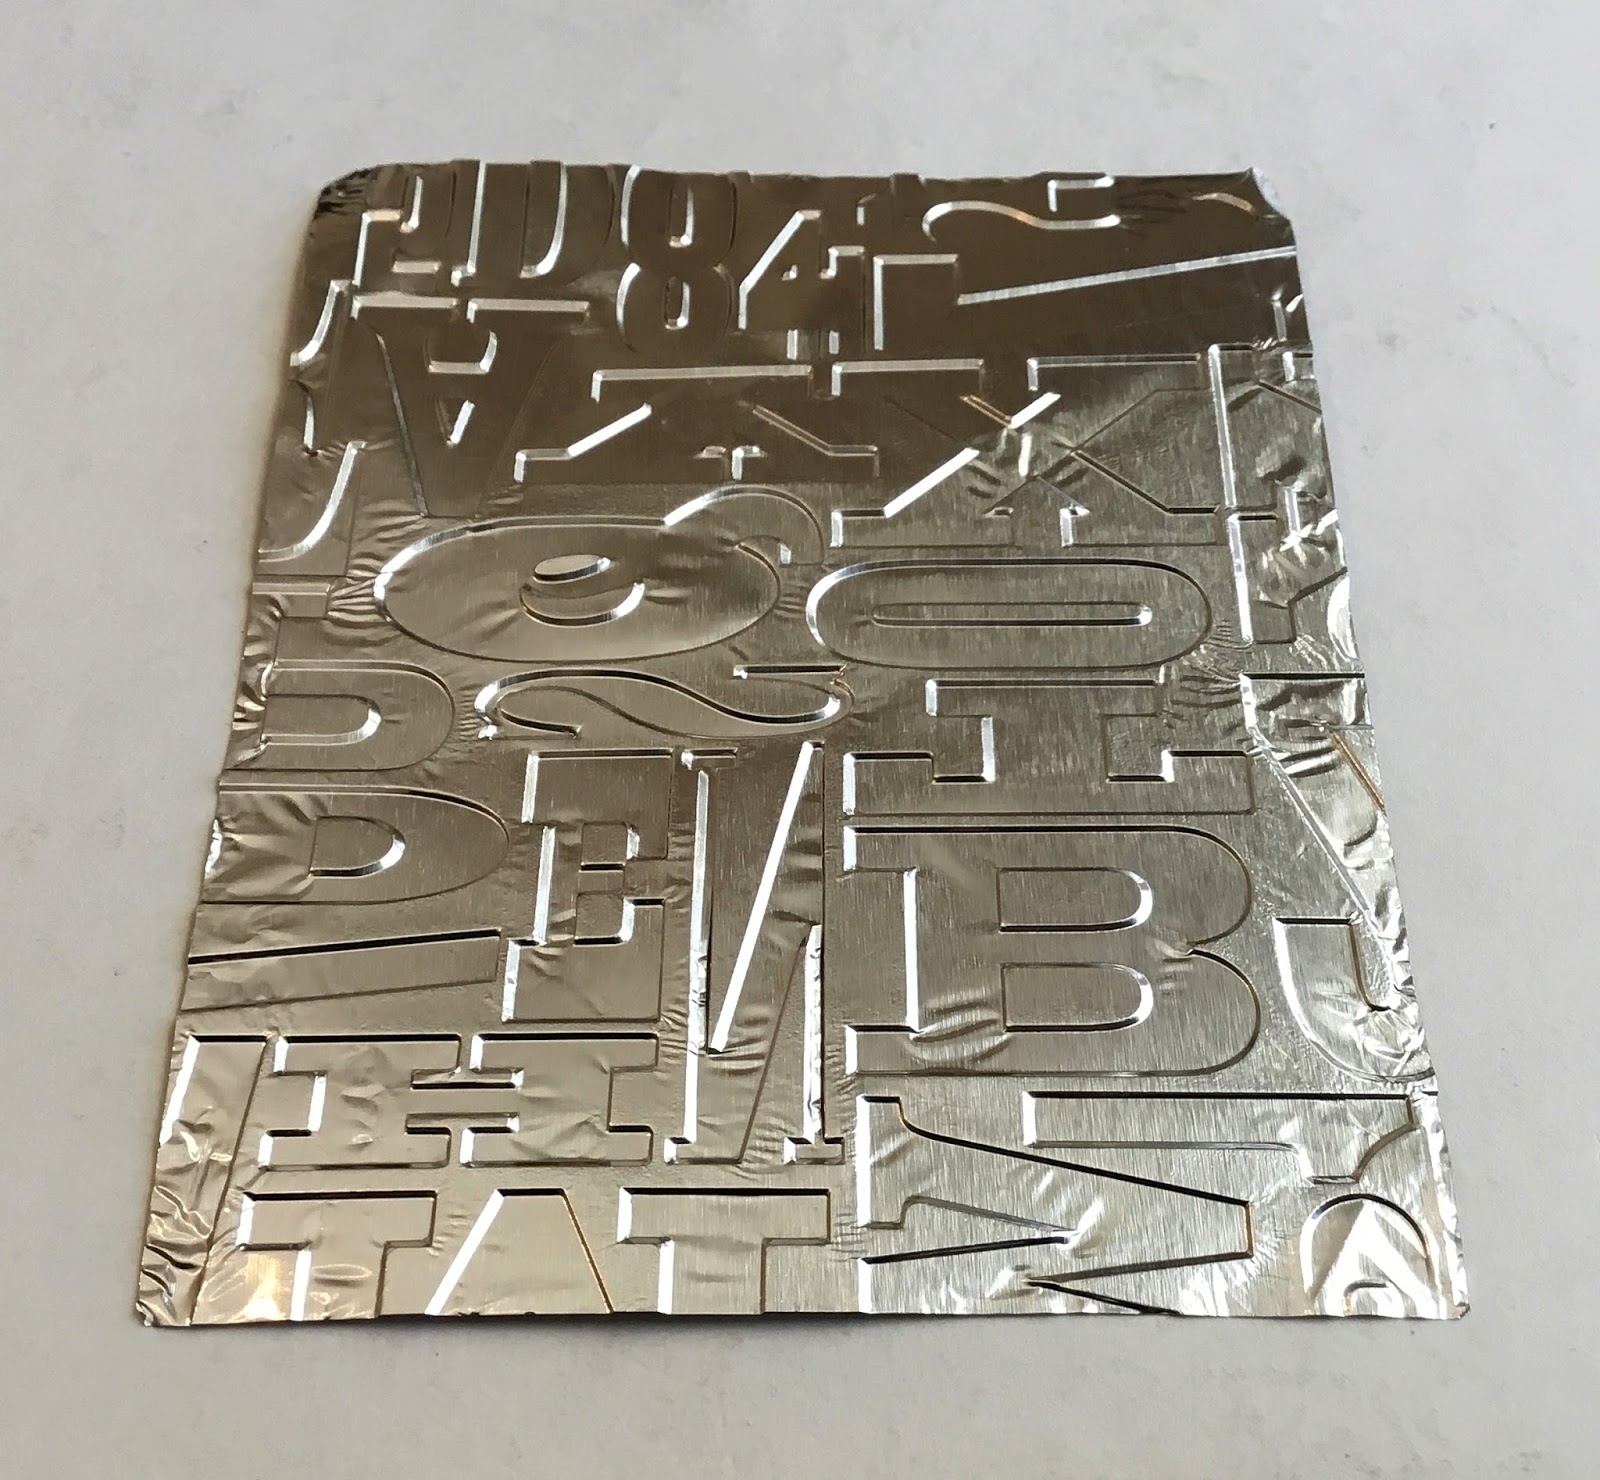
Unfortunately, the example pictured below can only be used on one side because it features letters. And, unless your perceived end result is meant to look a bit wonky, you'd want the letters to be facing the correct direction.
I think my favorite example here -- and perhaps the most realistic looking faux metal -- is the one portrayed below.
The first one shows the shinier of the two sides.

Shown below is the same design, only the more subtle matte-finished side.

This one also looks fairly classic. Victorian. Wallpaper. I do love it.

And, once again, the same design in the matte finish.
Equally as lovely, just more subtle.

Finally is the one that has no pressed design in the center,
just around the edges, for a festive look.

It would work well to add an oval paper focal point
if using this design for a greeting card.

If you don't already know this technique, here is how you make pieces that can be used in cardmaking.
Grab your roll of heavy duty aluminum foil. Cut a piece to the right size -- I used 3 3/34" x 5" for mine -- and insert inside your favorite embossing folder. Run through the Big Shot. That's it!!
They are fairly fragile, and you want to be careful to touch them as little as possible to prevent getting fingerprints on them. Also, nothing should be pressed down on them in order to preserve the raised pattern. If you set a heavy book on it, well, start all over. You will have flattened it pretty well.
When putting together a card, pop up some portion of the card so the pressure is not on the foil section. I don't think they would travel through the mail system very well, although I've never attempted it. I think these cards are better off hand delivered.
I plan on using one of these in my husband's birthday card. When I finish it, I will be sure to post it!
Grab some foil and a handful of embossing folders, and give this fun and EASY technique a try!
Faux
Smiles.
Now you have me needing these in my life! That is wonderful. I have so many ideas going through my head now.
ReplyDeleteOh, Christine! I love it! Stay tuned to see what I did with mine.
DeleteI have never seen this before, so I am going to have a go#inspirememonday@_karendennis
ReplyDeleteI have never seen this before, so I am going to have a go#inspirememonday@_karendennis
ReplyDeleteThese are fantastic Linda! I would love to have place mats or chargers like this. Thank you for sharing with us this week at Celebrate Your Story and we hope you will join us again next week.
ReplyDeleteLove these, I've done this with soda cans. Now they need some color added!
ReplyDeleteReally awesome! Thanks for sharing with SYC.
ReplyDeletehugs,
Jann
That's a fun technique. Would it work with well washed foil food dishes do you think? I don't know if you have them much but here in the Uk we get take aways and pies etc in foil containers sometimes, it's quite thick and I'm thinking this could be a fab upcycle idea.
ReplyDeleteI would think it would be awesome with the heavier foiled dishes! Now you have me want to try that! Thanks for the idea!
DeleteThat's a fun technique. Would it work with well washed foil food dishes do you think? I don't know if you have them much but here in the Uk we get take aways and pies etc in foil containers sometimes, it's quite thick and I'm thinking this could be a fab upcycle idea.
ReplyDeleteThank you so much for sharing on the Whisk It Wednesday Link Party! Have a wonderful week and I hope to see you again! Carrie @ Carrie’s Home Cooking
ReplyDeleteOh brilliant Linda. The embossing metal itself can get pricey so being able to use heavy duty foil is a great option. Featuring when my party opens tonight.
ReplyDeleteThose look amazing!
ReplyDeleteCindy @ Upcycle Design Lab