The CEO of Stampin' Up!, Sara Douglass, usually does a Facebook Live for all demonstrators each Tuesday afternoon. During these sessions, she often creates something using a specific product, maybe pointing out something we demonstrators hadn't thought of doing. It's always interesting, and I usually pick up something new.
During one such session, Sara worked with a stamp set that, until that point, I'd completely overlooked. The set, All Squared Away, can be found on page 117 of the Annual Catalog. Not sure why, but it just didn't catch my attention as I'd been perusing the catalog.
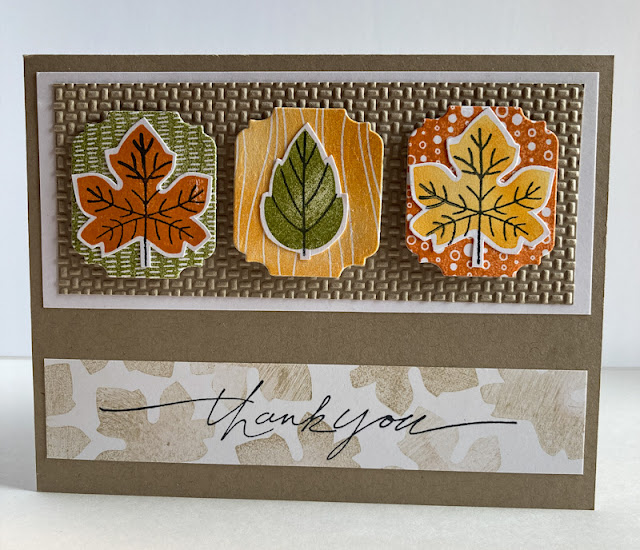
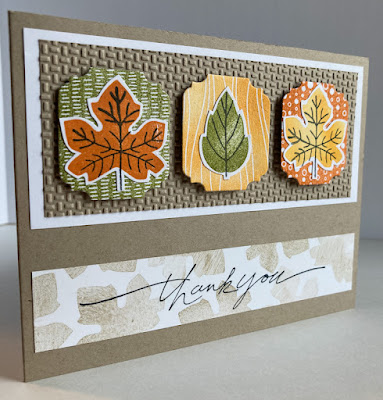
After her demonstration, however, I was determined to add this stamp set to my arsenal. When it arrived, I could hardly wait to use it. My first attempt with this set is the card shown below:
In this card, I combined lots of old and new elements, plus some stamps from a Paper Pumpkin kit. It was a blast to create.
One of the parts that I think makes this card pop is the unusually vivid embossing in the background.
I always forget about stepping up a sentiment strip with a little of stamped off stamping along the edges. Using one of the stamps found elsewhere on the card succeeds in bringing it all more together.
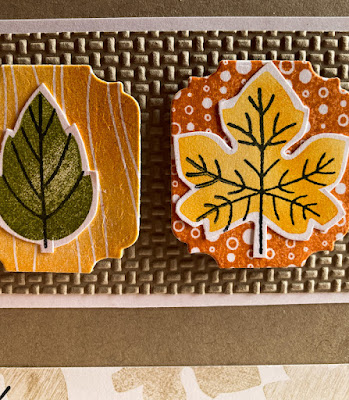
Just a closeup of the card elements:
Following you will find a list of supplies and a tutorial on how to create a card similar to this one.
SUPPLIES:
Crumb Cake cardstock
White cardstock
Crumb Cake ink
Old Olive ink
Pumpkin Pie ink
Mango Melody ink
Black ink
Stamps from the September 2021 Paper Pumpkin kit (hope you're a subscriber!)
All Squared Away stamp set (page 117, Annual Catalog)
Die Cutting Machine
Ornate Frames dies (page 164, Annual Catalog)
Tasteful Textiles Embossing Folder (page 155, Annual Catalog)
Stampin' Dimensionals
Paper Snips
INSTRUCTIONS:
Fold a 4 1/4" x 11" piece of Crumb Cake cardstock in half, creasing it well with a bone folder.
On white cardstock, stamp three of the four available designs from the All Squared Away stamp set, one square in each of these colors: Old Olive, Mango Melody and Pumpkin Pie.
Using a die from the Ornate Frames die set, cut each of these squares.
On white cardstock, stamp two maple leaves and one poplar leaf in the same colors. In black ink, add the veins to the leaves. Fussy cut the leaves, leaving a narrow margin of white around them. Adhere the leaves to the die cut squares, alternating colors.
Cut a piece of Crumb Cake cardstock that measures 2" x 5". Run this piece through a die cutting/embossing machine inside the Tasteful Textiles embossing folder. Arranging the leafy pieces, add them with a Stampin' Dimensional to the embossed piece.
Add the embossed piece to white cardstock that measures 2 1/4" x 5 1/4". Add this finished piece to the card base, leaving an even margin at the top and sides.
On a strip of white cardstock that measures 1" x 5 1/4" inches, stamp the larger solid leaf along the edges, stamping off first, so it's not overwhelming.
In black ink, add a sentiment. In my sample, I used a retired stamp because I love how it fills the piece so nicely. Do you still have this stamp set? It's so lovely.
Add this strip to the bottom of the card base so the placement is pleasing to you.
I know I frequently mention the Paper Pumpkin monthly kit. If you are not already a subscriber, you are seriously missing out on so many opportunities! Even if you subscribe for only a few months to get a taste, you can cancel any time if it doesn't please you completely. Check out Paper Pumpkin by clicking on the link. If you do subscribe and I've inspired you in any way through all the years, I would so appreciate it if you could name me as your demonstrator. Honestly, you will not be sorry for trying it.
Leafy
Smiles.


Loved this card for many reasons- graphic patterns, leaves, etc. Had to look up this stamp set which had not appealed to me at all before now!
ReplyDeleteAw, thank you so much for loving it! Yup! I'm with you on overlooking this set at first! In fact, I think I'm gonna go down to my Creation Station this afternoon and use it again!
DeleteWhat a pretty card; I love that textured background behind the leaves and I too often forget entirely about stamping off behind my words. It does look really nice though. Pinned.
ReplyDeleteThanks so much, Joanne!
DeleteWhat a lovely card!
ReplyDeleteGoodness! So much detail you put into these cards! It is very beautiful!
ReplyDeleteThank you so much for sharing it at the Sunday Sunshine Blog Hop!
Laurie
Ridge Haven Homestead
Thank you ever so much, Laurie!
DeleteSuch a pretty card, Linda!
ReplyDeleteMichelle
https://mybijoulifeonline.com,
Thank you, Michelle! I am so pleased that you like it.
DeleteYou've created a beautiful card with your new stamps! Thanks for sharing on Happiness is Homemade at LifeasaLEOWife.com. I've started a new link party to replace Traffic Jam Weekend, and I'd love to have you share with our readers there as well. It's called Crafty Creators, and it's open from Thursdays thru Mondays.
ReplyDeleteXOXO,
Niki ~ Life as a LEO Wife
I'm so glad you like my card, Niki! It was so much fun to create. And I did add my links to your new party, Crafty Creators! Thanks again!
DeleteDropping by again to say thanks for sharing on Crafty Creators!
DeleteThanks for having me!
DeleteI love the layout and the autumnal colour scheme you've used.
ReplyDeleteBridie @ Heart, Heath and Crafting
https://hearthearthcrafting.wordpress.com/
Thanks, Bridie!
Delete