
I have some of my work -- prints, bookmarks, and now, for Christmas, ornaments -- for sale at a wonderful little local boutique. All of the ornaments I share with you in this post are in this shop.
For someone with arthritis in her hands, these ornaments are a little difficult for me to make, but the end results make the struggle so worth it.
If you have a couple open ornament dies, you could easily make ornaments like these. After you've looked through a handful of my ornaments, I will give you a photo-full tutorial on how to make the ornaments on your own.


There! Now that you've had a little sneak peek of what we'll be making, I will commence with the tutorial, which will demonstrate how to make the second ornament that I've shown you above.
Choose your die and cut six of the shapes. If, like this ornament, it has a design that needs to be all the same direction, pay close attention to this. Hearts are most desirable when they are all facing the same upright way. So, when you are cutting the ornament pieces, be very aware of this direction when laying out your dies on the paper.

Fold all six pieces in half, from top to bottom,. If you don't do a good job of matching the edges exactly at this stage, you will run into problems. Use a bone folder to crease each one well.


Put glue on one side of one of the folded pieces and match it to the same side of the next piece. Continue in this way until they are all attached together, EXCEPT FOR JOINING THEM COMPLETELY TOGETHER.
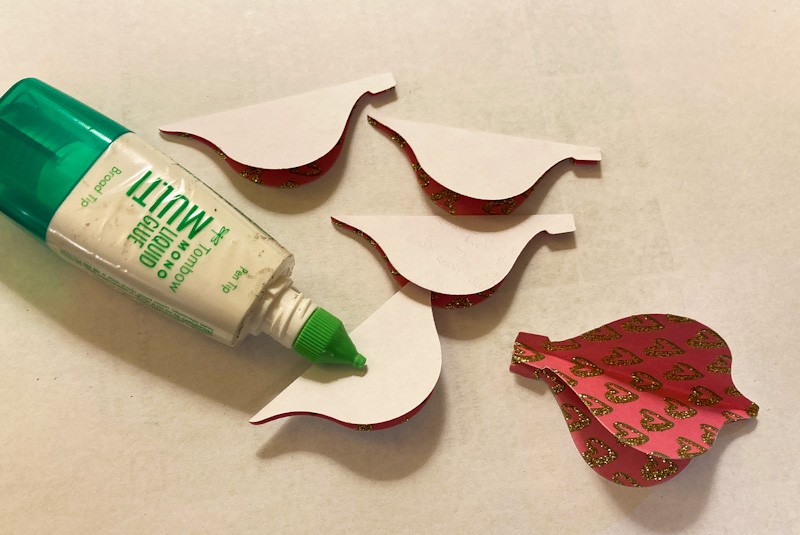
This photo shows all of the initial gluing finished, waiting for the next step.

Turn it so the joined folds are facing up. Run liquid glue up this area.

After cutting a piece of metallic twine to about 6" or so, fold it in half and rest the two ends together along this glue line, making sure it stays in place.

Add a bit of tape of the top part of it, pressing the tape into the groove, just as extra reinforcement so the metallic hanger doesn't pull out of place.
This next step, to me, is the most challenging, with my hands and lack of strength. Put glue on one of the remaining pieces, and lining the two sections up together as perfectly as you can, close up your ornament. I make sure I hold it a few beats so the glue catches really well. I even lay the ornament down and burnish the edges with the bone folder. You don't want all your work to fall apart!

Certain papers, when put together in this fashion, show a white edge. If that happens with your ornament, and it bothers you, grab an ink color that matches the main color of your ornament as well as possible.
Using a stampin' sponge, carefully sponge the ink along the edges to cover up the white.

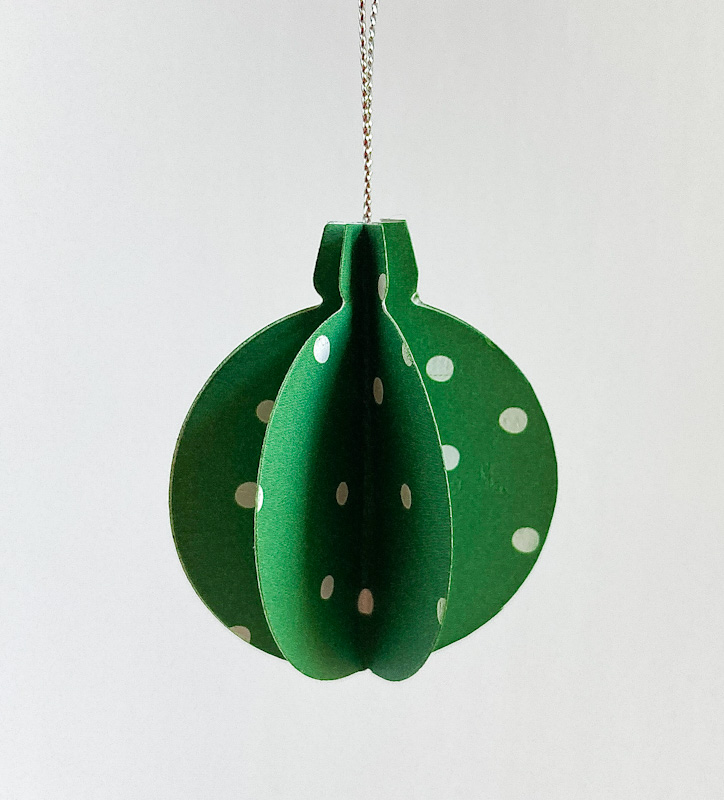
Yay! Your ornament is ready to find a place on your tree!

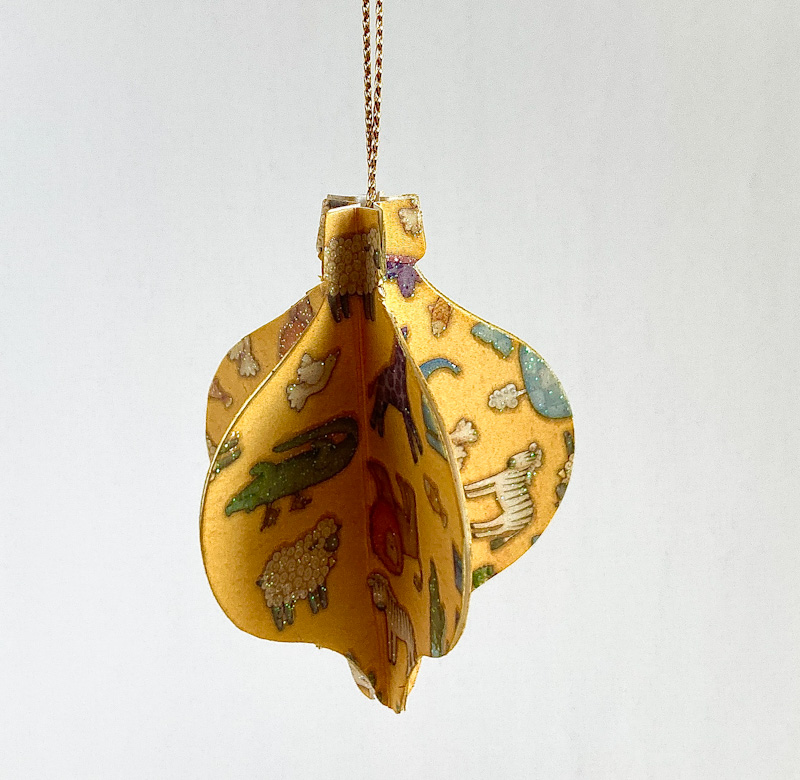
And, now, I'll share the rest of the ornaments with you. You can see that most of the time the papers I used weren't even Holiday flavored. They look beautiful and festive anyway! So, if you have fairly stiff designed paper, almost anything will work. Just have fun with this!


The ornament below almost killed my hands. It was especially thick and the designs were even thicker, almost an embossed feel. I was glad when this one was finished. If you have hand strength problems, be aware of this!
^^^^^^^^^^^^^^^^^^^^^^^^^^
We are the hero of our own story.
- Mary McCarthy -

^^^^^^^^^^^^^^^^^^^^^^^^
Ornamental
Smiles.
These ornaments are so clever, and I love the photo of the fuscia! (I can never spell that word with confidence!)
ReplyDeleteThanks for joining us this week at https://image-in-ing.blogspot.com/2022/12/a-continuation-from-last-weeks-post.html
Thanks so much, Sue!
DeleteThese are really cute ornaments Linda!!
ReplyDeleteThank you for sharing your project at Create, Bake, Grow & Gather this week. I'm delighted to be featuring you at the party tomorrow and pinning too.
Merry Christmas,
Kerryanne
Thank you so much, Kerryanne!!
DeleteEine tolle Anleitung und schöne Motive !
ReplyDeleteThank you, Jetta!
DeleteThank you for sharing this with Your Moment Blog Hop!
ReplyDeleteMy pleasure, Julie! Thanks for letting me share!
DeleteThese lightweight ornaments are so pretty! Thank you for sharing this post in the Talent-Sharing Tuesdays Link-Up 45.
ReplyDeleteCarol
www.scribblingboomer.com
Thank you, Carol!
DeleteLinda, great tutorial! This is something anyone can do, even the entire family. Have a very merry Christmas!
ReplyDeleteThanks, Cathy! I hope you and your family give them a try -- and have great fun doing it! Merry Christmas to you and yours also!
Delete