March 18, 2023

THINKING OF YOU

Here's a quick and easy way to make a card without too much thinking or planning. The secret is to make use of Designer Series Paper.


With white cardstock as your card base, as well as on the sentiment label, all you need is a bit of coordinating cardstock and a bit of bling. And maybe ten minutes. Ready?


SUPPLIES:
White cardstock
Pool Party cardstock (or any color that coordinates with the DSP you've chosen)
Celebrate Everything Designer Series Paper (page 87, Mini Catalog)

Sassy Salutations stamp set 

Coastal Cabana ink

Die Cutting/Embossing Machine
Festive Pearls (page 83, Mini Catalog)
All That Dies (page 64, Annual Catalog)
Stampin' Dimensionals

DIRECTIONS:
Fold a 5 1/2" x 8 1/2" piece of white cardstock in half, creasing it well with a bone folder.

Cut a piece of Designer Series Paper to 2" x 5 1/2".

Cut a coordinating piece of cardstock to 2 1/2" x 5 1/2". Adhere the DSP and the coordinating cardstock together. Add this piece centered onto the white card base.

In coordinating ink, stamp a greeting onto a scrap of white cardstock. Use one of the label dies from the All That die set to cut out the sentiment.

Use the two small flagged pieces from the same die set to cut two pieces from the colored cardstock. Add these two flagged pieces to the back of the sentiment label so equal amounts extend beyond the edges of the label.

Use Stampin' Dimensionals to add the strip on the card about 1 1/4" from the top of the card.

Add a Festive Pearl, or whatever piece of bling you'd like, to either side of the stamped sentiment.


^^^^^^^^^^^^^^^^^^^^
In case you ever foolishly forget, I am never not thinking of you.
 - Virginia Woolf -


^^^^^^^^^^^^^^^^^^^^

Unforgettable 
Smiles.


March 14, 2023

BAG-A-LOPE

If you've been stamping for awhile, you are probably aware of the existence of the BAG-A-LOPE. Right? It's such a cute way to use a simple envelope. You can so easily make an envelope -- of any size -- into a darling gift bag!


One of the Paper Pumpkin kits from awhile back included the prettiest decorated envelopes you've ever seen! If you're like most people, you will probably just toss the envelope that contained a card in the garbage. I thought these envelopes were just too wonderful to be tossed away after they did their job of transporting a greeting. 

I decided to make one into a bag-a-lope! So simple and easy! And they look like a million bucks for a small gift. 

I seem to find myself truly enjoying the videos of Jessica Taylor from Ink It Up With Jessica. She is so personable and concise in her projects. Rather than me reinventing the wheel, you can watch Jessica's brief video on how to construct a bag-a-lope here. She uses a plain business envelope cut in half and decorated with stamping. I love her bag! But, if you have a cute already-decorated envelope like I had, you can skip the stamping steps and get right to the construction.


To finish off my bag-a-lope, I added a cute diecut tag with sentiment. I also added ribbon handles and a flurry of yellow tissue. 


The dimensions of my bag-a-lope are about 3 3/8" wide, 5 1/4" tall, and 1" deep. It's surprising how much this size bag can actually hold!

Give a bag-a-lope a try! I think you will have fun with this simple projecct. And your recipient will be so impressed!


^^^^^^^^^^^^^^^^^^^^^

Yesterday's the past,
tomorrow's the future,
but today is a gift.
That's why it's called the present.
- Bil Keane -


^^^^^^^^^^^^^^^^^^^

Snowy
Smiles.


March 11, 2023

SEE THE GOOD

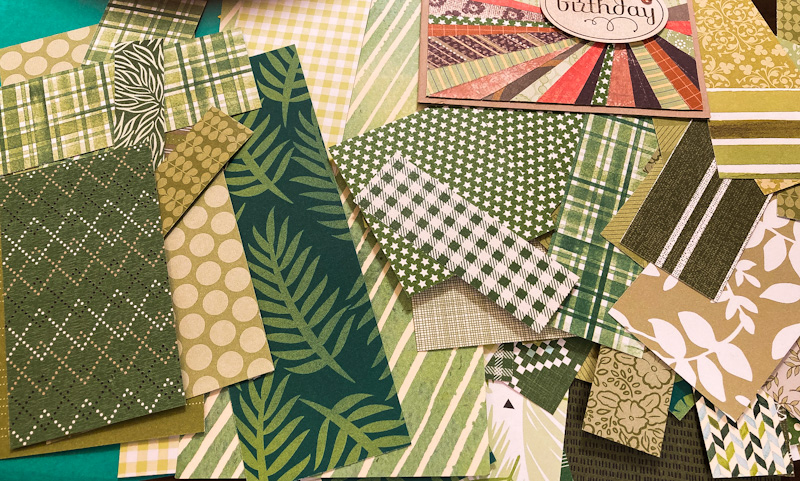
Sometimes when I go downstairs to my Creation Station, I want to do something a little more detailed and time-consuming. Recently I had rediscovered a card I'd made several years ago that fit the detailed/time-consuming bill perfectly. (You can see the card I'm referring to at the right in the photo below.)

I had always loved that card, so, I thought I would try to reproduce it. (The reproduction is the card on the left)


The photo shows my updated card.


To start my project, I looked through all my scraps of Designer Series Papers to see if I had a selection that would work well together. I decided to use greens and white in my card, tones resembling Old Olive to be concise.


The next step was to use strips of varying widths, ranging from about 3/4" - 1/4". I cut them into pointed pieces with my paper trimmer.


I cut a piece of DSP in Old Olive to 4" x 5 1/4" to use as my base. I did this just in case I wasn't able to snug the pieces tightly together. Then, at least, the proper color would show through. 

After deciding where I wanted to place my oval with the sentiment, I started building up my starburst. Where all these points meet can be a little crummy-looking, but not to fret because that area would be covered by the oval.

Since I didn't have a lot of strips with the obvious white, I tried to keep those pieces separated nicely in my layout.

Once all the strips were in place on the foundation, I turned the piece over and snipped off the pieces that extended beyond the edge.


You can see in the photo below the nice spacing of the white strips. It balances it out well. I think it would have been a little boring without the white breaks here and there.


Once all the strips were in place and trimmed, I added the 4" x 5 1/4" piece to a white card base.


I love the sentiment I chose for the simple oval, and stamped it in Old Olive ink. I added a leafy embellishment and a little tail to the oval, and attached it with a couple Stampin' Dimensionals.

Even though it was time-consuming and a little messy -- and sometimes somewhat frustrating -- I really enjoyed this Creative Therapy and am happy with the end result.


^^^^^^^^^^^^^^^^^^^^^^^^
Judgments prevent us from seeing the good 
that lies beyond appearances.
- Wayne Dyer -


^^^^^^^^^^^^^^^^^^
Good
Smiles.


March 7, 2023

BEAUTIFUL DAY GATEFOLD

How do you feel about gatefold cards? Are you familiar with them? Basically, a gatefold card doesn't open the traditional way. Instead the recipient opens the card by the middle of the card, so two "gates" open to either side.

Personally, I love gatefold cards. They are a fun fold, easy to create and look a little more special. Usually I like to add panels of Designer Series Paper to each of the two gatefolds. In this card, however, I opted to make my own DSP by using a loose outline stamp in a coordinating color to provide the design on two strips of plain white cardstock.

Another thing I did a little differently is that I stamped in black over a gray and white DSP for both the flower and the sentiment tag. I love that look!


Read on for a tutorial on how to create a gatefold card similar to this one.

SUPPLIES:
White cardstock
Designer Series Paper

Beautiful Day stamp set (retired)
A retired birthday sentiment stamp

Smoky Slate ink
Black ink

Gray ribbon
Oval punch or die
Die Cutting/Embossing Machine
Layering Circles dies
Stampin' Dimensionals

INSTRUCTIONS:
Take a 5 1/2" x 8 1/2" piece of white cardstock, and, with the Simply Scored, score it at 2 1/8". Turn it 180 degrees and score again at 2 1/8". Crease on the two score lines to get your card base. The two flaps should meet nicely in the center.

Cut two pieces of white cardstock to  1 7/8" x 5 1/4". On these two pieces, stamp an open image (I used the flower) randomly in Smoky Slate ink. Adhere these to the two gatefolds.

In black ink on a section of the DSP, stamp the flower in black ink. Fussy cut this flower, leaving no white borders. 

Cut two 4" pieces of gray ribbon. Crisscrossing the pieces on the back of the fussy cut flower, tape the ribbons in place. Trim the ends at angles.

From white cardstock, use a circle die to cut a 2 3/4" circle to fit the flower on. Adhere the flower with ribbons to the white circle.

In black ink, stamp your sentiment on another piece of the DSP. Use the oval punch or die to cut this out. Because the other side of the Designer Series Paper will show when the card is open, use the same oval with white cardstock. Adhere the DSP oval and the white oval.

Adhere the two components to the flaps of the card. Add Stampin' Dimensionals to the flower only on the right side, and mount it to the righ hand flap about 1/2" from the top.

Repeat with the sentiment oval, putting Dimensionals only on the left side and mounting it to the left gate about 3/4" from the bottom.


^^^^^^^^^^^^^^^^^^^^^^
The world is all gates, all opportunities, 
strings of tension waiting to be struck.
- Ralph Waldo Emerson -


^^^^^^^^^^^^^^^^^^^^^

Gated
Smiles.


March 4, 2023

#365birds JANUARY 2023

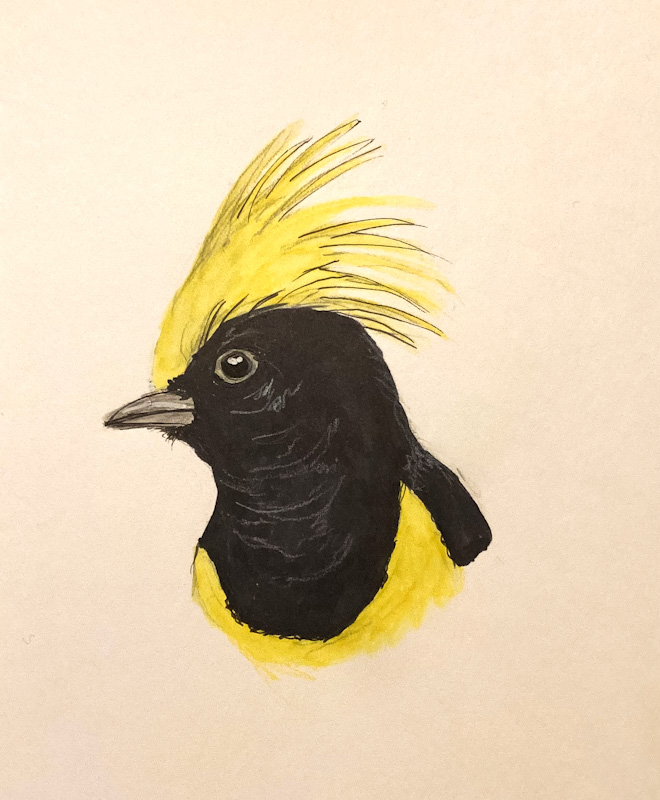
My #365birds project is going really well, and I'm enjoying it all for the most part. Some days it's a little more difficult to get myself psyched up to draw a bird. But, I always manage to get one done.

For those of you who do not know, on November 3, 2022, I embarked on a personal journey to draw a bird each and every day for a year. Thus #365birds was born. Before I began my challenge, I'd typed out and cut into strips the names of 365 birds. Each morning upon waking, I randomly reach for one of the slips. This is the bird for the day.

In this blog post, I will feature 15 of my bird drawings from January 2023. As I always do, I will note the name of the bird above each drawing, as well as any pertinent information I have on each specific bird, usually the area of the world in which the bird can be found.

day 60 - plate-billed mountain toucan

south america


day 61 - southern yellow-billed hornbill
south africa

day 62 - sultan tit
india

day 63 - emperor penguin
antarctica

day 66 - hill partridge
foothills of the himalayas

day 71 - green and black fruiteater
subtropical south america

day 72 - ground roller
europe, africa, australia

day 74 - australian ringneck
australia

day 76 - bare-throated bellbird
brazil, paraguay, argentina

day 77 - nightingale
europe and the palearctic

day 80 - helmeted hornbill
brunei, indonesia, malaysia, myanmar, southern thailand

day 81 - seven-colored tanager
northeast brazil

day 86 - cassowary
australia

day 88 - red-backed fairywren
northern australia

day 89 - pale-headed rosella
australia

And there you have it. If you're interrested, I most often use Derwent Inktense Pencils, along with some Posca Pens and Copic Markers. My blacks come from Pigma Micron Pens, as well Derwent Line Makers. 

Please don't make copies of my drawings. If you are interested, contact me and I will have prints made for you.

^^^^^^^^^^^^^^^^^^^^
.No bird soars too high if he soars with his own wings
- William Blake -


^^^^^^^^^^^^^^^^^^^^

Drawn
Smiles.