April 4, 2023

STAMPED DEER IN A CLEARING

Awhile ago I shared a card on my blog featuring a diecut deer in a clearing. It was a white-on-white card. Completely diecut.

I truly loved that card, but this time I wanted to try the components of the same bundle in a card, but this time, both the stamps as well as the dies.


The white-on-white completely diecut card I shared with you previously:


This latest card is very labor intensive. I started out by stamping part of the scene in a neutral color.

Since I needed to do some masking, I stamped the deer image one more time with a temporary adhesive on the back of the paper I'd stamped it on. I then fussy cut this piece, being careful to cut a little bit INSIDE the inked portion. 


If you cut right on the inked line, you get too much of a halo effect around the masked image. I got some of that anyway, but it was fixable.


After fussy cutting my deer mask, I laid it right on top of the deer I had originally stamped. I then stamped the next set of trees, with the stamping going right over the deer. 
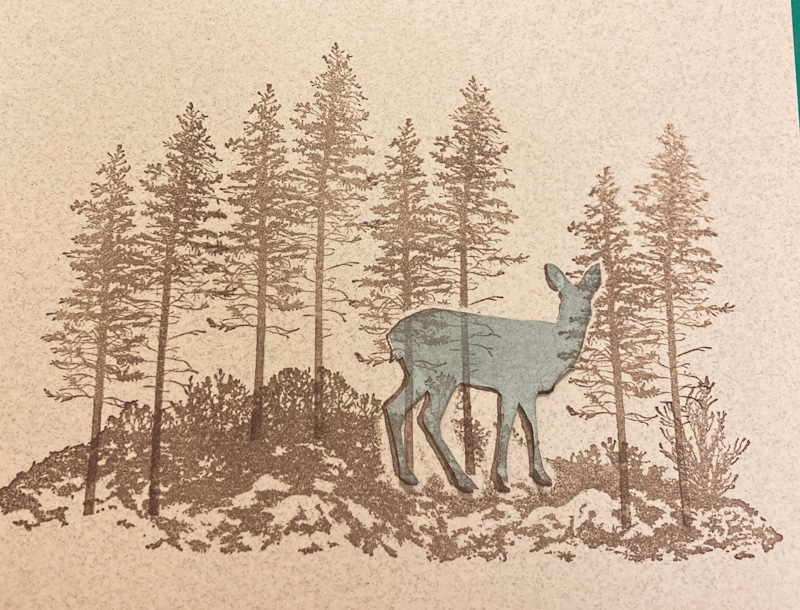

By having the mask in place, I didn't get trees going over the stamped deer. In using the mask, once it was removed, it appeared that the deer was standing in front of the trees.


You can see in the previous photo that I have a bit of halo around the deer, where there is no ink. I was able to fix that with a Stampin' Write Marker in the same shade, by drawing in the missing portions.


After the stamping was all finished, I die cut the tree foreground. Placing it in front of the stamping, the deer was fairly lost among the trees. While this is perhaps realistic in spotting a deer in a wooded setting, I didn't want it for my card.

You can see in the photo below that I'd added lines on the trees/branches that I thought should be eliminated so the deer can be more out in the open.
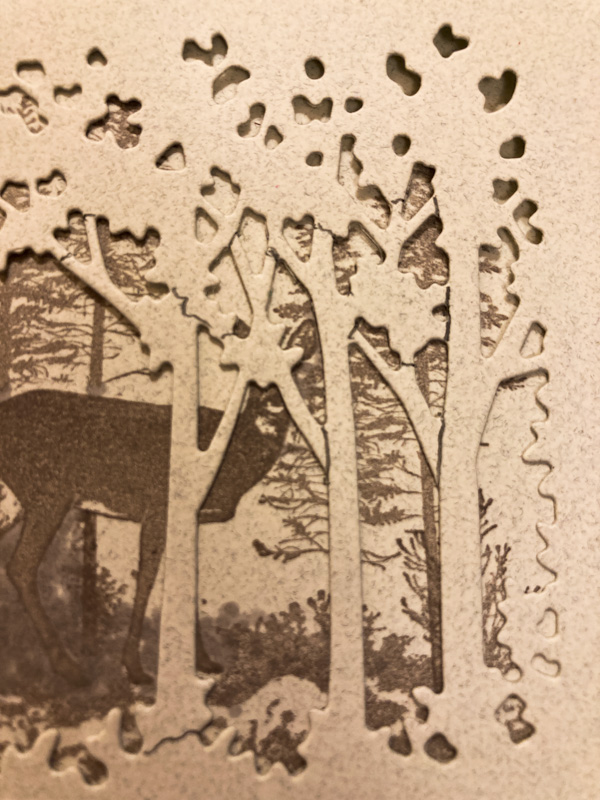

The next photo shows how much of the diecut trees I'd carefully cut away.


I put Stampin' Dimensionals in strategic places on the back of the diecut piece.


The next photo shows how the setting turned out after some pruning of the trees. 


And a closeup:


The card took a lot of time, patience and precision. But I am quite happy with the final result.


^^^^^^^^^^^^^^^^^^^^^^^
How can a deer tell when a leaf falls silent in the forest? 
She hears it breathing differently.
- Richard Bach -

^^^^^^^^^^^^^^^^^^^^^^^^^

Deer
Smiles.


April 1, 2023

#365birds FEBRUARY 2023

First of the month. Time for another installment of #365birds, a month's worth of bird drawings I've completed as part of my own personal challenge.

As part of Terry Runyan's #dailycreatinggroup on Facebook, I'd discovered my true love for drawing birds. As a result of that discovery, starting on November 3, 2022, I set out on a personal journey of drawing a bird each day for a whole year.

You will find below 15 of the birds I drew during the month of February. Above each of my drawings, I will tell the name of the bird, as well as the area of the world in which it can be found.

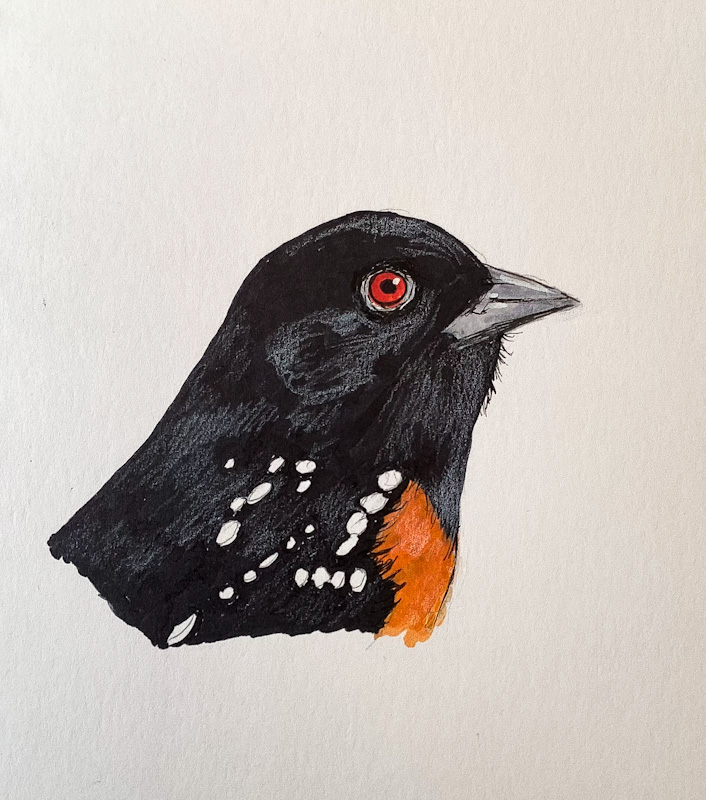
day 94 - spotted towhee

northwestern north america


day 95 - madagascar red owl
madagascar

day 96 - european goldfinch
throughout europe into northern africa and central asia

day 97 - capuchinbird
northeastern south america

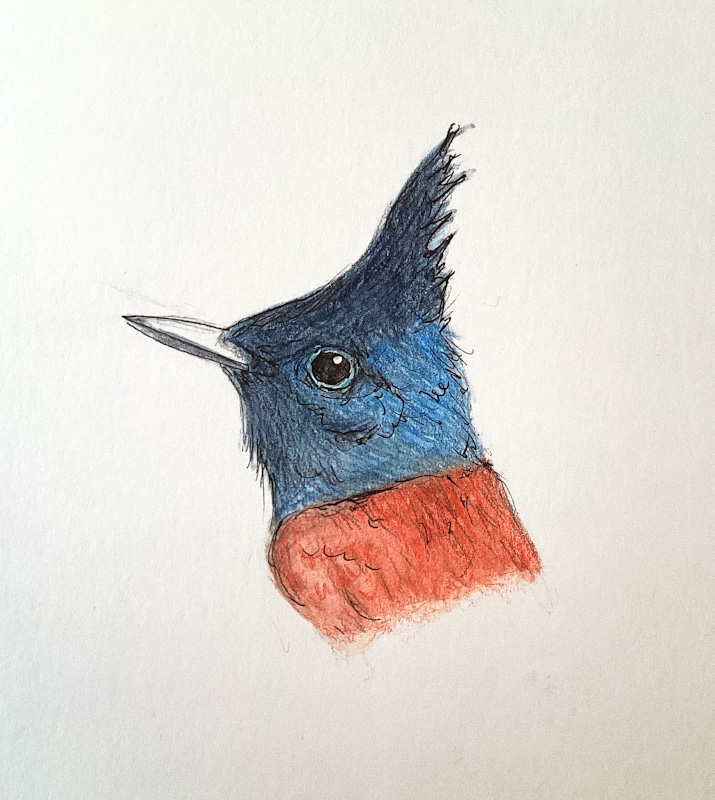
day 98 - asian paradise flycatcher
asia

day 99 - silver-breasted broadbill
bangladesh, bhutan, cambodia, china, india, indonesia, 
laos, nepal, malaysia, myanmar, thailand, vietnam

day 100- claret-breasted fruit dove
southeast asia and oceania

day 101 - yellow oriole
northern south america

day 102 - new zealand kea
new zealand

day 106 - flameback woodpecker
south asia

day 109 - black-throated bushtit
asia

day 111 - crested finchbill
southeastern asia

day 115 - green jay
central and south america

day 117 - brown pelican
atlantic, gulf, and pacific coasts of the americas

day 118 - red-whiskered bulbul
tropical asia

And there you have it. Another month's worth of birdies. Stay tuned for the March drawings in about a month.

Thank you for not reproducing my drawings without my consent. If you would like prints of any of them, please let me know. 

^^^^^^^^^^^^^^^^^^^^^^^^^^^
Tame birds sing of freedom. 
Wild birds fly.
- John Lennon -


^^^^^^^^^^^^^^^^^^^^^^

Feathered 
Smiles.


https://www.facebook.com/groups/dailycreating


March 28, 2023

BEAUTIFULLY HAPPY

I have for you today a beautifully simple card that could be used for virtually any occasion, except probably something masculine.

Because of the versatility of the card, I purposely didn't add a sentiment.


The card, which is an unusal size, 4 1/4" x 6 1/4", is especially simple to make because the card base is preprinted, and they have gorgeous envelopes with gold foil designs on both front and back, and a coordinating print inside the envelope. I found this set of card bases and envelopes on the Stampin' Up! Clearance Rack, a good place to find terrific deals, especially when there is a new refresh.


I stamped a lovely floral image on a piece of white cardstock and embossed it in gold. It would also have been beautiful if I'd colored in the image with Stampin' Blends. But I decided to just go with the elegant embossed look. A trio of  Polished Dots  and a snippet of Petal Pink ribbon were just right to complete the card.


SUPPLIES:
Stampin' Up! card bases and envelopes
White cardstock
Petal Pink cardstock

Beautifully Happy (stamp set from Sale-A-Bration)

VersaMark ink

Heat Tool
Embossing Buddy
Gold Embossing Powder
Polished Dots
Petal Pink Ribbon

DIRECTIONS:
This card measures a normal 4 1/4" wide, but is 6 1/4" long. It would be easy to tweak it a bit to fit on a standard 4 1/4" x 5 1/2" card base.

Cut a piece of white cardstock to 2 3/4"' x 4 3/4". Rub an Embossing Buddy well over the entire piece. Centered on this piece, stamp a large flower outline stamp with VersaMark Ink. Heat emboss the flowers with Gold Embossing Powder.

Mount the embossed piece to a 3" x 5" piece of Petal Pink cardstock.

Wrap a length of 1/8" Petal Pink ribbon around this piece about 3/4" from the bottom. Tape the ends of the ribbon to the back side. Cut another piece of the same ribbon and tie it into a bow. Use a Glue Dot to attach it to the center of the folded-around ribbon.

Adhere this finished piece centered onto the card base.


^^^^^^^^^^^^^^^^^^^^^^^^^
Some cause happiness wherever they go;
others whenever they go.
- Oscar Wilde -


^^^^^^^^^^^^^^^^^^^^^

Happy
Smiles.


March 25, 2023

THUMPED MAPLE LEAF

In the world of stamping, have you ever heard of the technique referred to as "thumping"? A really useful technique for certain situations, it gives you a unique look every time you do it, no matter how hard you try to duplicate your efforts.

Read on, and we'll talk about how to do some thumping.. It's a very easy technique, but, as I said before, it is completely unpredictable. It is actually perfect for subject matter such as fall foliage, as I used in my card.


You can get the variegated look of a fall leaf  by doing thumping. To do this, you need your choice of water-based markers. Stampin' Write Markers are perfect for this. You need a solid stamp, such as this large maple leaf and its little seed helicopters. 

Choose maybe 3-4 colors that will work well for what you intend to accomplish. The first step is to lay down a base color. I used the lightest color, which was So Saffron. I simply inked up the stamp with this color in the conventional way

Starting with the lightest color of the markers, So Saffron,  and holding the stamp facing up in your nondominant hand, thump all over the stamp randomly using THE SIDE OF THE MARKER. Turn the stamp as you thump so not all the color strokes are in one direction. Taking the next lightest color, do the same thing in parts you hadn't thumped with the first color. Continue until you run out of colors. Remember to keep turning the stamp. When you've used all the colors, go back and fill in some of the spaces where there is no color.

In "normal" thumping, at this point, you would huff over the inked stamp. Then, before the stamp goes dry again, you stamp your image.

My card, however, was done a bit differently. When the "thumping" was finished, I spritzed it sparingly with water. Then I stamped it. By doing it this way, the colors bleed and blend differently. 

As shown in the photos below, I tried FIVE different times to get the look I was hoping to achieve. To be honest, I wasn't completely happy with any of the five.

Before trying thumping, I attempted something a little different on this first leaf. I simply inked up the leaf with the ink pads themselves. While the colors were good on this one, I did not like the lines made by the ink pads.

It was at this point I decided to try the thumping technique.


In the next photo, I once again inked up the stamp with the So Saffron base. I then thumped with Stampin' Write Markers in Merry Merlot, Pumpkin Pie and Old Olive. I didn't mind it too much, but wish the color had been more evenly distributed.


The next leaf showed the veins nicely, but I still wasn't thrilled. Should I give up?


The photo below compares all my attempts:


I finally ended up using the one below, even though it was far from satisfactory.


After cutting out the leaf with a die from the Seasonal Labels dies. I wanted to mount this to a background of the same color, but wanted to jazz it up somewhat. 

First I embossed a 4" x 5 1/4" piece of the cardstock with the Painted Textures 3D Embossing Folder. While this added some interest to the background, it was still too drab for my taste. 

I remedied that with a little light ink added to the peaks of the embossing with an Embossing Brush. Keeping the light touch with the ink was key to a successful background. I popped up the leaf diecut with a couple Stampin' Dimensionals.

The card was finished by adding the textured panel to a card base made from the same cardstock.


What are your thoughts? Have you ever used the thumping technique yourself? Were you happy with the results? Do you have any other variations you could add?


^^^^^^^^^^^^^^^^^^^^^^
Every leaf speaks bliss to me, fluttering from the autumn tree.
- Emily Bronte -


^^^^^^^^^^^^^^^^^^^^^^^
Thumpy
Smiles.


March 21, 2023

FUSSY CUT EDGE

If  you have been following my blog for any amount of time, you probably already know two of my favorite papercrafting techniques that I love to do: Coloring with my Stampin' Blends on black and white Designer Series Paper and fussy cutting. Those two time consuming activities are the best possible Creative Therapy for me.

In today's card, I did both of my favorite things. Yesss! 


The photo below shows a few interesting things. 

First of all, look at the far left of the photo. Notice the partial sheet of little colored flowers. Well, I have every single one of the Stampin' Blends ever made. I needed a way to keep them all in order and well at hand. Thus, I found a cute little open flower stamp and stamped rows and rows of them onto white cardstock until I had just the right amount to match the number of markers I possessed. I'd purchased enough of the Stampin' Blends Storage sections to accommodate my huge collection. After sorting all my Markers according to rainbow order -- ROYGBIV -- I also store them with the light variation first. 

Next step was to color in the rows of little flowers in that exact order, after which I labeled each flower with the Marker color name as well as L or D (light or dark). This organization takes up two sheets of cardstock that I put back to back into a sturdy sheet protector, part of which shows up in the photo. I cannot tell you how many hundreds of times I have grabbed this handy resource. This way I know exactly what each color looks like on white cardstock, as well as where I can find specific markers in my Storage tower, since that is set up with the same number of rows as my resource. 

The photo also shows a large portion of the black and white DSP I'd been coloring, as well as the finished coloring on that area. You can see that I chose not to color a portion of this cluster of flowers, in that the fronds were excessive for what I hoped to accomplish. The Designer Series Paper was from the Perfectly Penciled pack in the Annual Catalog.

Finally, the photo indicates which Stampin' Blends I used in my coloring: Dark Daffodil Delight, Light Soft Succulent, Light Mint Macaron, Light Balmy Blue, Light Just Jade, Dark So Saffron and Dark Petal Pink. Obviously I never get rid of any Blends that retire. I keep them all!!


The photo below shows the card held in the closed position with a small clothespin. In an upright position such as this, the card doesn't stay closed completely. I wanted to show how the fiussy cut colored portion lies against the white backdrop.


In the following photo, you can see how uncooperative it is when it's not held shut. But this also shows the detail of the fussy cutting.


A closeup of the whole card:


In order for the fussy cut portion to hover over white, since my card base was in Balmy Blue, I cut away 1 1/4" of the card front, and lined the inside of the card with a 4" x 5 1/4" piece of white cardstock. I had to be very careful in my gluing so that the fussy cut edges lined up exactly. 

I added a tiny diecut "hello" in Petal Pink cardstock, as well as a trio of Polished Dots I'd found on the Clearance Rack. 


^^^^^^^^^^^^^^^^^

I must have flowers, always, and always.
- Claude Monet -


^^^^^^^^^^^^^^^^^^^
Fussy
Smiles.