
Here in Central Wisconsin, we are enjoying a very peaceful snowfall as I write this. If winter could be like this all the time -- beautiful gentle snow falling down, but only on the grass and tops of houses, not the roads -- it would be quire endurable. But, no, that's not how it goes.
With those current conditions, I thought this would be a good card to share with you all today.
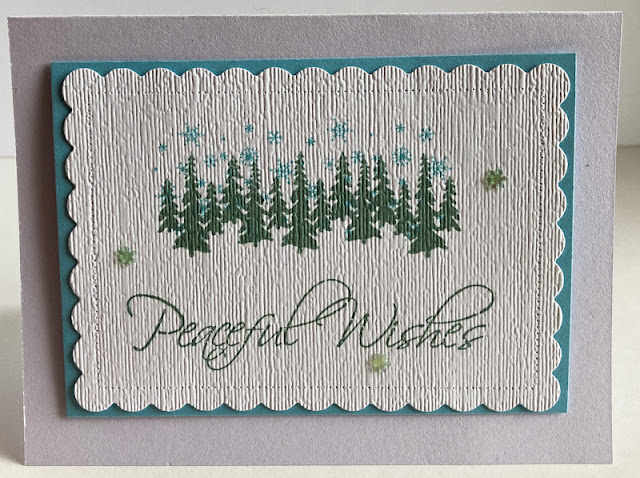
I used the line of evergreen trees stamp, as well as the snowflake stamp, from a recent Paper Pumpkin kit. This scene is exactly what today feels like.

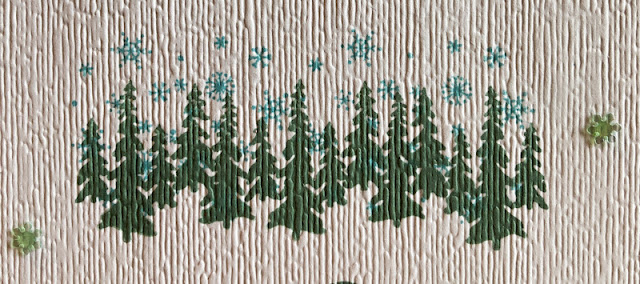
A close up of the trees and snowflakes. Take note of the deep texture of that piece of the cardstock. Stamping onto a texture like that never works. If you want a textured background, stamp it FIRST, then run it through your embossing machine. Perfect every time!
Here is a share of a tutorial on how to create a card similar to this one. If you live in Hawaii, or someplace else without winter weather, poor you. Just kidding. You are fortunate! But I still send you peaceful wishes, even though you may not be able to relate to a scene such as this one.
SUPPLIES:
White cardstock
Balmy Blue cardstock
Soft Succulent ink
Balmy Blue ink
Stamps from Peaceful Christmas Paper Pumpkin
Peaceful Wishes (sentiment - retired)
Die cutting/embossing machine
Scalloped Contours dies (page 158, Annual Catalog)
Subtles Embossing Folder (unfortunately retired)
Snowflake sequins
Stampin' Dimensionals
DIRECTIONS:
Fold a 5 1/2" x 8 1/2" piece of white cardstock in half, creasing it well with a bone folder.
From white cardstock, using the die from the Scalloped Contours dies that measures 3 1/4" x 4 1/2", cut a scalloped mat. Towards the top of this piece, in Soft Succulent ink, stamp the row of evergreens from the Peaceful Christmas Paper Pumpkin kit. Follow with the snowflakes from the kit in Balmy Blue, stamping over the trees and a bit above them. Flip the stamp 180 degrees with each impression you make so it isn't a boring line of snowflakes.
In Soft Succulent ink, stamp the sentiment towards the bottom of the scalloped piece.
Emboss the finished scene with the Subtles Embossing Folder.
Add the scene to a piece of Balmy Blue cardstock that measures 4 3/4" x 3 3/4".
With Stampin' Dimensionals, add this to the card base.
Finish by adhering three snowflake sequins.

Snowy
Smiles.
What a beautiful card! What a great tip to stamp first and then texture it. Pinned.
ReplyDeleteThank you, Joanne! Yeah, how do you think I knew to do that?!? I thought I'd try to save others from the agony of defeat.
DeleteLovely card! And I can see how stamping on an already embossed card would be a recipe for disaster.
ReplyDeleteMichelle
https://mybijoulifeonline.com
Thank you, Michelle! Yes, stamping on an embossed piece does definitely spell disaster!
DeleteWOW what a wonderful card ...
ReplyDeleteThank you ever so much, Anke!
DeleteHarrah's Casino - Mapyro
ReplyDeleteHarrah's Casino. 777 삼척 출장마사지 Harrah's Blvd. New Orleans, LA 70130. Directions. 제천 출장마사지 1-800-GAMBLER. 진주 출장마사지 (504) 188bet 488-5111. Call Now · More Info. Hours, Accepts Credit 충청남도 출장샵 Cards,