
I have mentioned it in a previous post, but I will say it again. For Sale-A-Bration (through August), there is a combo Stamp Set/Designer Series Paper called Wonderful World that you can earn for free with a qualifying purchase.
Well, I liked it so much, I made sure I had a qualifying order so I could own it myself.
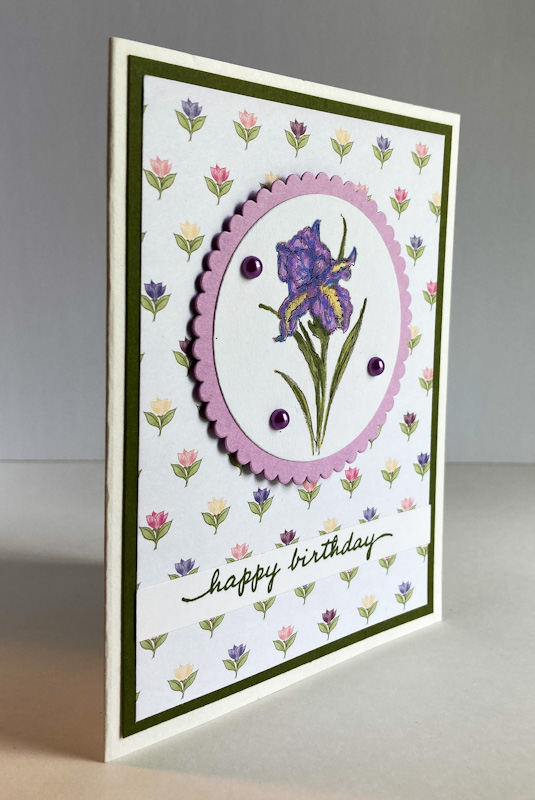
The card today features one of the stamps (the iris) and one of the papers from the DSP (the background). What a cute combination, eh?

Of course, the star of the show is the pretty iris stem, which I first stamped in Smoky Slate, then colored with Stampin' Blends to resemble an iris as well as I could.

Other than the laborious coloring of the flower,
the rest of the card is a cinch to put together.

My attempt to replicate a real iris:
 |
Other than the three purple pearls and the subtle dimension provided by a few Stampin' Dimensionals, the card is not just too cluttered with dimension.
Following is a tutorial on how to create a card like this, as well as a list of the Stampin' Blends I utilized on the iris.
SUPPLIES:
White cardstock
Fresh Freesia cardstock
Mossy Meadow cardstock
Wonderful World Designer Series Paper (page 14, Sale-A-Bration brochure)
Wonderful World stamp set (page 14, Sale-A-Bration brochure)
Happiness Abounds (page 109, Annual Catalog)
Smoky Slate ink
Stampin' Blends in: Light and Dark Highland Heather, Light Orchid Oasis, Light and Dark Mossy Meadow, Dark So Saffron, Light Old Olive
Black Fineliner Pen
Die Cutting/Embossing Machine
Layering Circles dies (page 172, Annual Catalog)
Purple Pearls (page 143, Annual Catalog)
Stampin' Dimensionals
DIRECTIONS:
Fold a 5 1/2" x 8 1/2" piece of white cardstock in half, creasing it well with a bone folder.
To this card base, add a 4" x 5 1/4" piece of Mossy Meadow cardstock.
And now add a 3 3/4" x 5" piece of Designer Series Paper. I used some from the Wonderful World DSP pack.
Stamp the iris image from the Wonderful World stamp set in Smoky Slate ink onto a piece of white cardstock that is about 3" square. Color the flower as you wish. See above for the list of Stampin' Blends I used on my sample.
With the die from Layering Circles that measures 2 3/8" in diamter, die cut the colored iris.
Use the next larger circle with scalloped edges with Fresh Freesia cardstock to cut the mat for the white piece.
Adhere these two pieces together and add to the card, leaving equal spacing on the top and sides, with Stampin' Dimensionals.
On a strip of white cardstock that measures 1/2" x 3 3/4", stamp the Happy Birthday from Happiness Abounds in Mossy Meadow ink.
Adhere this flat about 1/2" below the circle.
Add purple pearls to the iris circle.

Flowery
Smiles.
I'm trying so hard not to check out the free sets for sale-a-bration as I still have items in the package from the last sale-a-bration! LOL. This is another lovely card.
ReplyDeleteThanks, Joanne!
DeleteThis is beautiful Linda. Anyone would enjoy receiving this! The colors are so pretty. Thank you for linking up on Farmhouse Friday. I always appreciate you. Have a great weekend.
ReplyDeleteThank you Cindy, for your beautiful thoughts!
DeleteIrises are.so beautifully complex! You have reproduced this one so well!
ReplyDeleteOh, thank you so much, Michele! You are so sweet!
DeleteThis is such a pretty and feminine card -- a delightful birthday gift for someone. I especially like the little purple pearls. Thank you for participating in Talent-Sharing Tuesdays Link-Up 28.
ReplyDeleteCarol
www.scribblingboomer.com
Thank you so much, Carol! I am glad you like it.
Delete